How to Choose & Use Hiking Poles: A Foolproof Guide
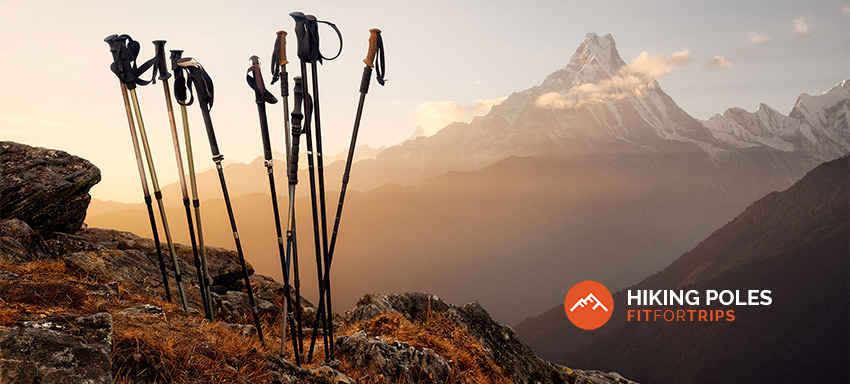
The use of hiking poles has exploded since the 1990s when they were seen by most American hikers as a novelty. Since that time, hikers without poles have become the minority. Indeed, most guided trips either require hiking poles or offer them optionally.
Everything You Need to Know About Using & Buying the Right Hiking Poles
Initially called “trekking poles” (the more common term in Europe), cross country skiers and snowshoe hikers found the added benefit of using poles year-round, especially in the Nordic countries where such activities are a way of life for many. As the use of poles grew, people wanted something more than a fixed-length snow sports pole. Demand for multi-section poles that are easy to pack and adjust prompted manufacturers to develop new designs and production techniques. Aerospace-quality aluminum shafts allowed the telescoping poles to be strong yet light in weight.
The widespread adoption of hiking poles in the USA spread through several avenues of experience. People returned with poles in their luggage from hiking in Europe where trekking pole use was common. Mountaineers and outdoor guides quickly adopted the adjustable poles and got them for client use. Three-section poles were carried by ski shops and outdoor specialty stores, but poles really took off when they got the stamp of approval from outdoor magazines like Backpacker and Outside. The use of poles went from enigmatic to being cool.
First, you should become familiar with the different companies that produce quality trekking poles.
Here are a few of the most reputable brands (in no particular order):
Are the Best Hiking Poles Always the Most Expensive?
Despite being half the price of the better known brands, Cascade Mountain has a very good reputation and are recommended by a number of reputable long distance hikers:
- Cascade Mountain Tech Trekking Poles ($24.99) – “Aircraft Grade” aluminum / 10.4 oz or LESS THAN a pound / Quick lock & Extendable / CORK and EVA grip options / Extended EVA grip. Includes snow baskets, sand/ mud baskets, rubber boot tips, rubber tips, trekking pole clip and a carry bag.
I would be remiss not to mention an observation I’ve noticed with Fit For Trips readers: They are purchasing the two brands below, which have an impressive number of ratings at almost 5 stars. I would recommend that you use these for day hikes just incase there are some durability issues. Although there are some thru-hikers that swear by them.
- TrailBuddy Trekking Poles ($36.99) – Adjustable Lightweight Aluminum / Quick Adjust Flip-Lock / Cork Grip / Padded Strap. Also comes with 2 pairs rubber tips, mud baskets, and snow baskets (snow baskets for light snowshoeing only, NOT for skiing).
- Hiker Hunger Trekking Poles ($59.99) – 100% Carbon Fiber Trekking Poles/ Quick Adjust Flip-Lock / Cork Grip / Nonslip EVA Foam Grip extension. Also comes with carry bag, rubber feet, snow and mud baskets, as well as tip covers.
Easily Available Popular Trekking Poles – NEW ADDITIONS
- Black Diamond Alpine Carbon Cork Trekking Poles ($199.95) – Despite the price, the Alpine Carbon Cork is the most popular trekking pole amongst long distance hikers. It is strongly built for the long haul and thus not a lightweight wonder at 17 ounces, the weight of many aluminum poles. Carbon fiber is very good at absorbing shock and has a comfortable cork grip. The metal fliplocks should last indefinitely.
- Black Diamond Pursuit Trekking Poles ($149.95) – These all season aluminum poles have cork grips and come in two sizes to fit a wide range of hand sizes. A 1.5 mm hex tool is built into the shaft for field repair. The foam lower grip extensions are handy in very steep terrain.
- Black Diamond Distance FLZ Trekking Poles ($159.95) – One of the most popular of the folding aluminum pole sets for a reason – they are reliable, comfortable and easy to travel with, yet only weigh an ounce more than standard collapsible trekking poles. The Flicklock clamp allows 15 mm of height adjustment for each of the three sizes.
- Black Series Carbon Trekking Poles ($199.95) – These carbon poles have Leki’s superb Aergon Air grips with cork surface. The 8 degree grip angle features an easily adjustable quick-drying wrist strap to meet all the ergonomic requirements of your hands. Extended lower foam grips allow quick hand position changes on very steep terrain.
- Leki Makalu Lite Cork Trekking Poles ($149.95) An updated Aergon Grip with cork is supremely comfortable. The built-in 8 degree angle keeps wrist at a neutral angle. Extended lower foam grips allow quick hand position changes on very steep terrain.
- Leki Jannu Trekking Poles – women’s ($119.95) – Popular women’s aluminum poles known for great grip comfort. Leki angles the grip 8 degrees to keep the wrist at a natural angle. Speedlock clamps make for quick adjustments. A thumbwheel allows for fine lock pressure tuning without tools.
- Leki Khumbu Lite Trekking Poles – men’s ($119.95) – Leki’s popular aluminum pole is known for a most comfortable grip, even when palming the top. The microfiber wrist loop molds to hand and dries quickly. Leki flip locks are reliable and easy to adjust. A thumbwheel allows for fine lock pressure tuning without tools.
- REI Co-op Traverse Trekking Poles ($119.00) – These aluminum poles are high quality at a great price. Comfortable cork grips, easy to adjust metal lever locks. You can’t go wrong with these poles.
- REI Co-op Flash Carbon Trekking Poles ($169.00) – At 13.6 ounces, these carbon fiber poles are a few ounces lighter than aluminum and excellent at dissipating shock. Dense foam grips, easy to adjust wrist straps. Two different sizes cover a raange of heights.
My Initial Experience with Hiking Poles
My first experience with real hiking poles was mountaineering school at Mt. Rainier. Up until that point, I thought only old people and hikers with bad knees used hiking poles (and now I’m old and have bad knees!). But I quickly found the advantage of poles extended beyond their use on snow fields. Of course the poles helped ease the load going downhill, but I was amazed at how much they helped going uphill, like being in 4-wheel drive!
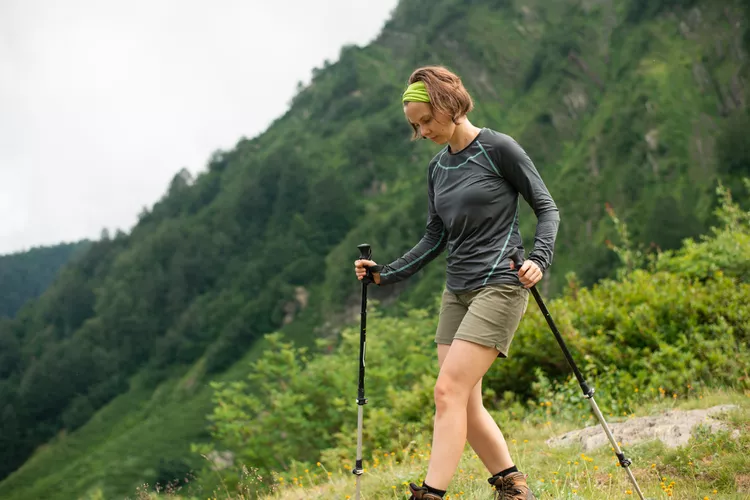
Hiking downhill with trekking poles.
The hiking poles helped me maintain my balance and footing while I crossed talus slopes and rock slides. Tricky stream crossings without poles became easy as the poles helped support me against the current and loose rock bottoms. The poles saved me from ankle sprains more than a few times, and they certainly kept me from busting my behind! Try crossing a windy ridge in 40-50 mph gusts without hiking poles, and you’ll quickly appreciate the support they provide.
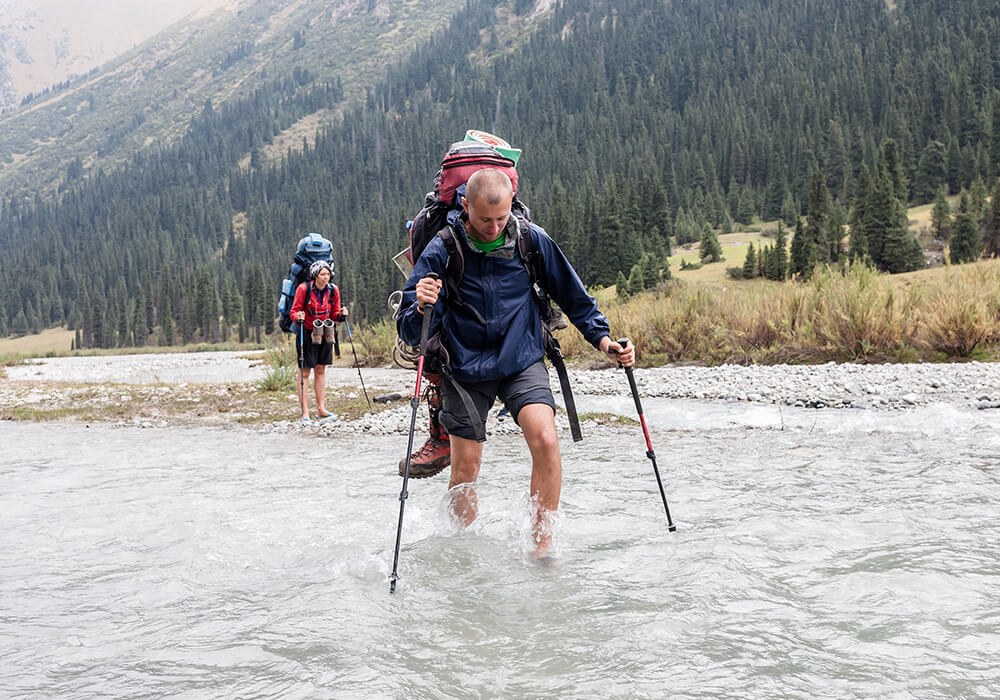
River crossing with hiking poles helps you stabilize and balance against the current.
Get to Know Hiking Pole Parts From Top to Bottom
Grips
You’d think a grip is a grip, but they actually vary quite a bit. Grips come in different shapes, widths, and materials. Some poles are sold in a “women’s” version, meaning they have smaller grips. Forget the nomenclature and get what fits your hand comfortably.
Good quality poles use three different grip materials or a combination of them: foam, rubber and cork.
Dense EVA foam is popular, has good grip when wet, and is relatively cool in the hand in hot weather. Modern foam is surprisingly tough, though it is the least durable of popular grip materials. Foam can absorb some moisture, which could feel very cold in the hand in winter conditions. Foam is used on poles at all price points, but not all foams are equal. Premium poles use premium foam. Poles in the cheaper spectrum, caveat emptor.
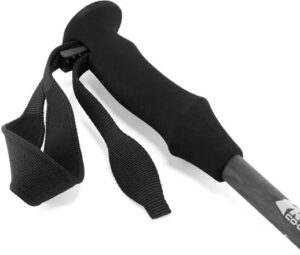
REI Co-op Flash Carbon trekking poles with Foam Grip
Rubber grips are very durable and grip well in cold conditions. Sweat and body oils from bare hands tend to make the rubber a bit slippery. Better quality rubber grips have a bit of silicone in them, which give good grip in the rain. However, many hikers, snowshoers, and cross country skiers prefer rubber in the winter as the rubber doesn’t absorb water and offers good grip while wearing gloves. Rubber grips are also available on hiking poles at many price ranges. Shy away from stiff feeling rubber – that is the type that gets slippery when wet. Softer rubber has good grip in all conditions.
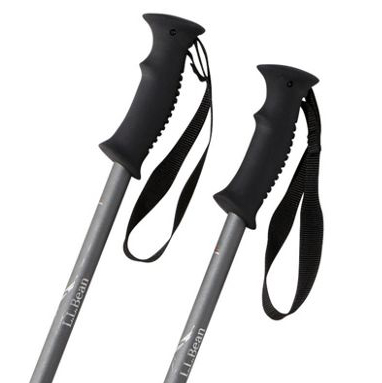 Trekking poles with Rubberized Grip
The grip material considered to have the best all-around performance is cork. Ground cork is molded with a polymer to make a durable grip that absorbs very little moisture, has good grip even when sweaty, and is fairly cool in the hand. You will find cork grips on mid-priced and premium poles.
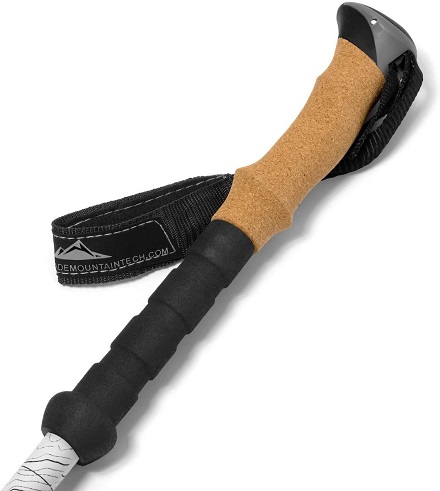
Cascade Mountain Tech trekking poles with Cork Grip and Foam Grip Extension
Grip shape and fit is important, too. Some grips will have an index finger bump as an aid for holding the pole. A few grips are molded with “knuckles” between the intended finger placement; however, if your hands don’t fit the molded grip, you’re out of luck! Many poles will have a little ledge molded into the bottom of the grip to help keep your hand in place.
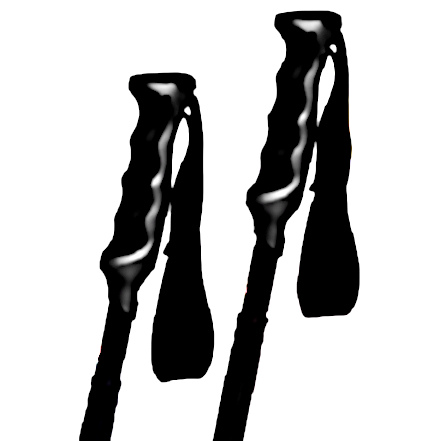
Trekking poles molded with “knuckles” on the grip
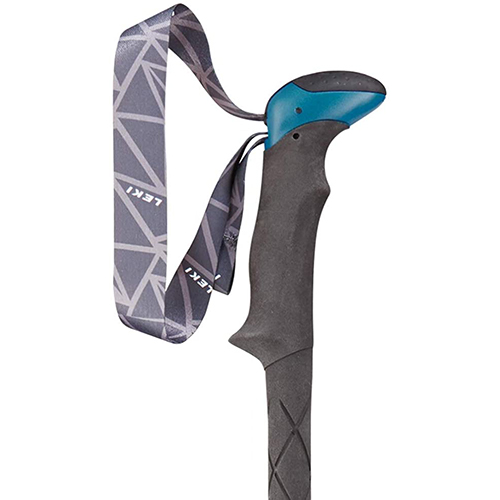
Leki trekking pole with Index Finger Bump. Note angled grip in the design.
These days, premium hiking poles have an ergonomically angled grip (lower price poles typically have a straight grip). The angle allows your wrist to rest at a more natural angle when the poles are pushing behind you on the ground. Grips that don’t have any angle to them may put pressure on your wrist and forearm tendons by forcing them into an unnatural position, but much of that factor can be mitigated with efficient technique (More on technique later in the article).
There are times when use of the very top of the pole with your palm may be required, such as negotiating a steep step down off a boulder. A grip that is somewhat rounded and smooth on the top to fit your palm will be much appreciated in such situations. When you easily have half or more of your weight pressing on the top of the pole, it’s not a good time to have the grip grinding away at your palm! Grip tops do vary quite a bit and some poles are much more ergonomically designed than others. See how it is going to feel with the center of your palm on top of the grip with most of your weight on it before buying.
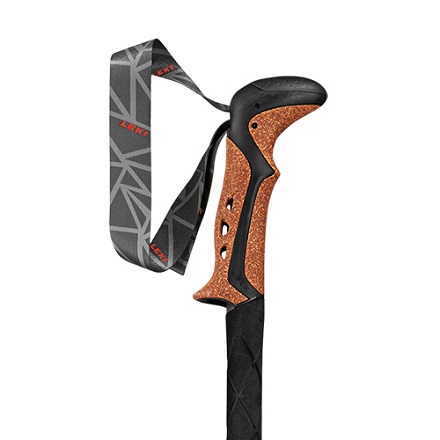
Leki pole with rounded grip top for palm comfort. Note angled grip in the design.
Grip Extension (lower grip)
Some poles (usually the expensive ones) have a covered section beneath the hand grip for grabbing the lower part of the pole (choking down) in steep-sided traverses where the pole on the uphill side needs to be shorter than the pole on the downhill side. As mountain trails often have switchbacks, a lower grip lends itself to quickly changing direction versus stopping to adjust pole length. Grip extensions can also be handy when you need to choke-down in steep terrain, such as stepping up on a boulder. Grip extensions can be added to any hiking pole by using tennis racket or gold club grip tape, hockey tape, or grippy bicycle bar tape.
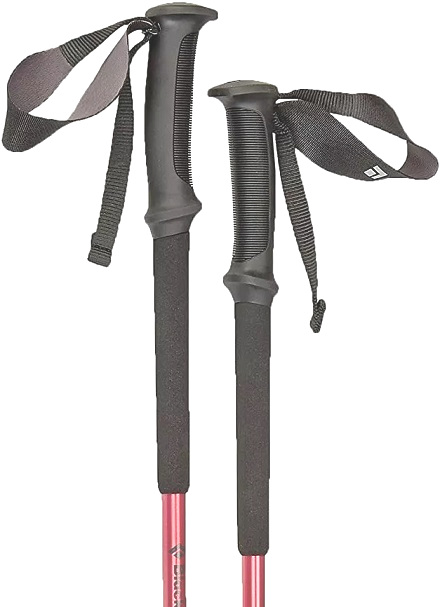
Black Diamond trekking poles with Non-slip EVA foam grip extension
Straps
Nylon straps positioned at the top of the grips are adjustable. Straps are an integral part of efficient pole use for most hikers. Properly designed and adjusted straps offer support for your weight (versus having the grip of your hand take all the weight), make the pole easier to swing with your walking cadence, and keep the poles from slipping away from you (like sliding downhill into a place that can’t be reached). Quality straps include some type of soft material that contacts your skin, such as airbrushed nylon, microfiber, or neoprene.
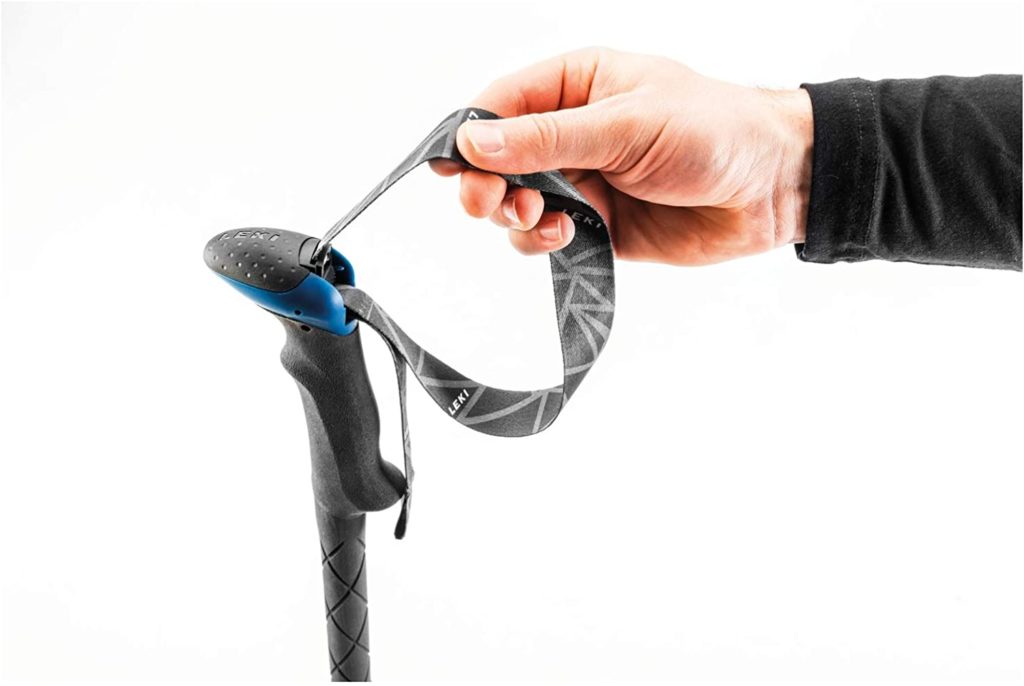 Leki trekking pole displaying Adjustable Strap
Some hikers dislike the confining feel of straps and either cut them off or just don’t use them. I see this method most often on ultralight, single piece carbon fiber poles. Such poles are so light they must be fully held by the grip, and the strap may get in the way. The downside is despite how light the poles are, your hand is always in the grip position which can produce hand fatigue. We’ll discuss how to properly use the straps below.
Some hikers inevitably get blisters while using hiking poles, often from strap rub that develops with sweaty hands. If you feel a hot spot developing on your hand or fingers while using poles, stop and put some first aid tape or duct tape on the spot before it develops into a blister. Experienced hikers with sensitive skin often wear fingerless gloves to reduce friction. Fingerless gloves made for paddling, working out, sailing, or rappelling will fit snugly and have no paddling. Bicycle gloves are not as ideal because the paddling tends to get in the way. Fingerless gloves weigh next to nothing and take up no more space than a pair of thin socks, so carrying a bit of insurance could be worth it.
A Different Grip System

Leki developed the Shark system, an efficent glove-based grip technology initially designed for Nordic ski poles. The ergonomic glove-grip gives precise pole control and power transfer for hiking and trail running. The breathable fingerless glove offers a secure fit and precise pole control. Along with the sweat-absorbing grip the Shark system offers unparalled comfort, support and control whether going downhill, uphill, negotiating a rock garden or cruising on the flats. The glove is designed to easily engage and disengage from the pole grip. Shark gloves for cold and wet weather are avilable from Leki.
Pole Material 101
Carbon Fiber or Aluminum Hiking Poles?
Initially, 3-section poles were produced with aluminum shafts. Aluminum is very durable and reliable, but the search for lighter weight materials continued.
Quality aluminum poles use aerospace grade aluminum alloy and are anodized to prevent corrosion (galvanic, such as salt air coastal regions). High grade aluminum poles are in the 16-20 ounce range. Aluminum tubing is very durable and can take an amazing amount of bend before giving in (refer to tent poles). Too much bend and it will stay there! A dent here or there will typically be tolerable, but a big dent could lead to failure (beware creased dents).
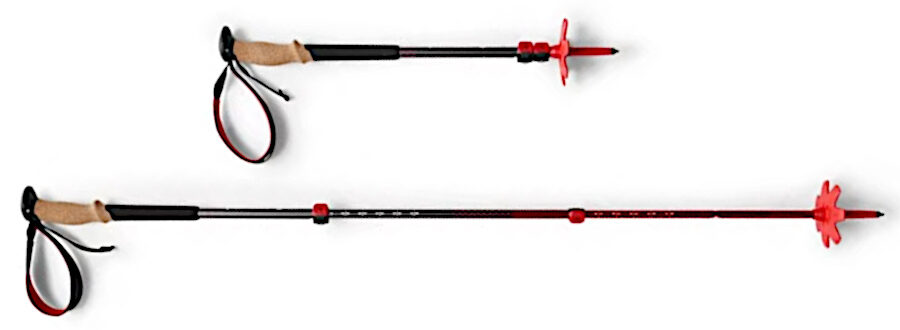
Black Diamond Pursuit Aluminum trekking poles
Carbon fiber hiking poles began to appear as materials in science progressed. Originally marketed for their light weight, they proved to be unreliable, splitting apart from compression or snapping in half at the slightest nick from a rock. Manufacturers then started making three section carbon fiber poles with thicker tubes for strength and better lamination for durability. They weighed about the same or slightly less than light aluminum poles. Carbon fiber is a good choice for dispersing vibration, thus reducing the amount of shock transmitted to your hands. The big feature of carbon besides weight is stiffness. Carbon fiber is stiffer than steel for its weight, which is why NASA uses carbon in the space shuttle (not to mention high performance cars, motorcycles, and bicycles).

Black Diamond Alpine Carbon Cork carbon fiber trekking poles
Once the reliability was there, carbon fiber poles became widely accepted and are used in premium models from all the major manufacturers (as is aluminum). A pair of three section carbon fiber poles can weigh 14-18 ounces (about the same as quality aluminum poles or slightly lighter) for a three section pole or as little as nine ounces for fixed length poles.
Carbon fiber poles have been well proven in every environment on earth, but they do have their limitations; you should know about these before buying. This is from a major pole manufacturer: “The strength of carbon fiber is compromised if the pole’s surface is dented, frayed, gouged, scratched, fractured, chipped, or otherwise damaged which could result in catastrophic failure.” Not all carbon poles are made the same. Quality carbon poles from a quality manufacturer are not cheap. Cheap poles do not have the engineering and quality control for long-term reliability. Check the warranty before purchasing.
Aluminum inherently weighs slightly more than carbon fiber, but is much more durable. Aluminum poles can flex under pressure without breaking, bang against rocks harmlessly, and even survive a rear car hatch closure. Aluminum poles have been proven in every type of terrain and weather on every continent. As long as you give the pole section locking mechanism some care, aluminum poles can last several decades.
The prices of premium aluminum and carbon fiber poles are basically in the same price range, $130-$200, with carbon being on the higher end, though there is a lot of price overlap depending on features. I can’t say it enough – check the warranty and replacement policy before purchase.
Folding or Telescoping Hiking Poles?
There are basically two types of pole designs for hiking: poles that extend and collapse by sliding sections similar to a telescope and poles that can fold up, similar to tent poles with cord holding them together (quality hiking poles use a strong, durable kevlar type cord material). Single piece, unfolding poles exist but we will not address them here as they are inconvenient for air travel.
Telescoping hiking poles have been around since the 1980s and are well proven. A telescoping pole will last for decades if you properly take care of it. They use a mechanism for locking the three pole sections together. The locking mechanism adds some weight to the poles and takes a few moments to adjust to length. Telescoping poles are 23-28 inches long when they are collapsed. The downside is locking mechanisms can break or freeze up – some are more reliable than others.
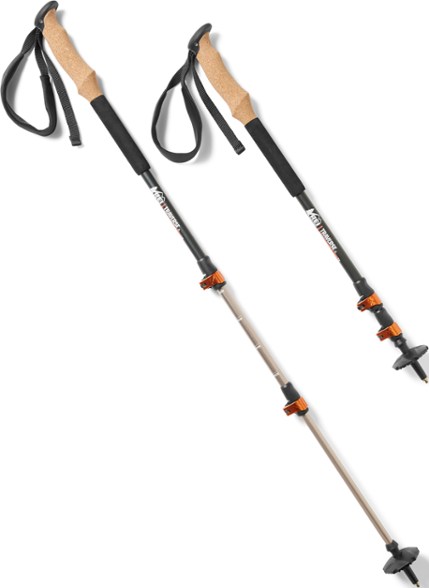 REI Co-op Traverse Telescoping trekking poles
The advantage of folding hiking poles is they are only 13-18 inches long when collapsed for packing. Folding poles are much quicker to deploy and collapse than telescoping type poles, virtually just taking a few seconds – a flick, a click, and you’re done. Great for hikes where you’ll be doing a lot of scrambling and want to stow the poles away. Folding poles come in adjustable length versions and fixed length versions. They sometimes weigh an ounce or less since there are fewer fittings to hold the pole sections together.
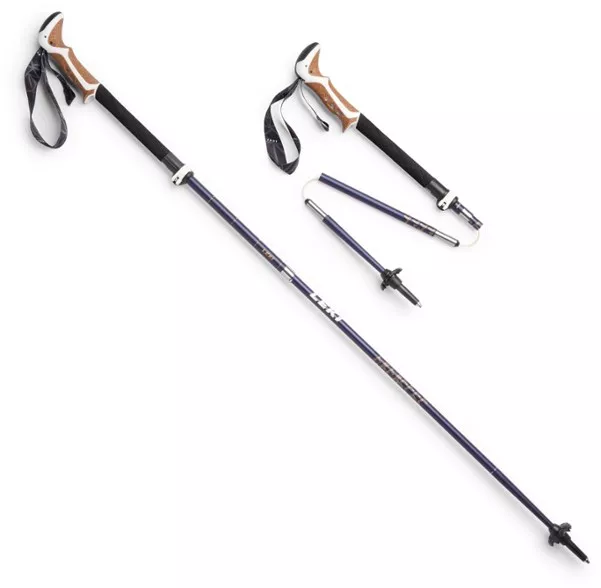 Leki Folding Trekking Poles
The downside to folding hiking poles is that on some models the lower section is not locked in place and can spin around in relation to the upper pole – not a good thing when it is stuck in mud or a tight place. The tension cord can develop a bit of stretch with use; it needs to be re-tensioned from time to time, which is no big deal and can be done in the field. Read the directions before using on the trail.
Despite its great strength, the kevlar cord that holds the poles together has been known to break at internal friction points. Though the cord can be replaced on quality poles, it resides inside a protective plastic sheath that makes replacement complicated. The plastic sheath was meant to prevent damage to the cord but a number of users have reported cord breakage over time (read long-term user reviews; it occurs with some brands more than others). Still, folding poles are a revelation on those types of hikes where you’re repeatedly stowing and deploying hiking poles.
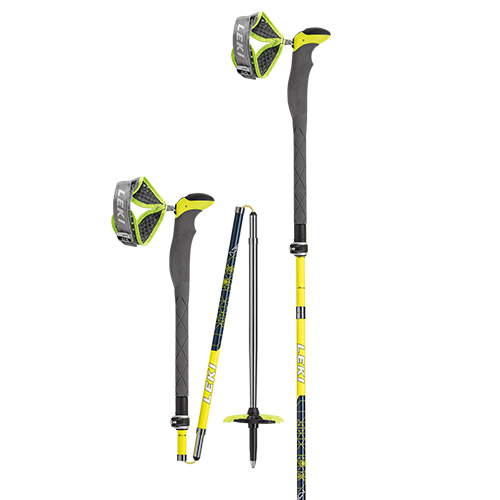 Leki Folding carbon trekking poles showing the kevlar cord
Locking Mechanism
Lever Lock
Quick Lock/Flick Lock/Lever Lock/Speed Lock/Power Lock by any other name is a cam lock mechanism holding the three poles together. The cam lock consists of 3 parts – the lever, the collar, and the tension adjuster. When the lever is closed (folded in next to the pole) it compresses a cam that squeezes the two poles together, one pole inside the other. The resulting joint is stronger than either pole on its own.
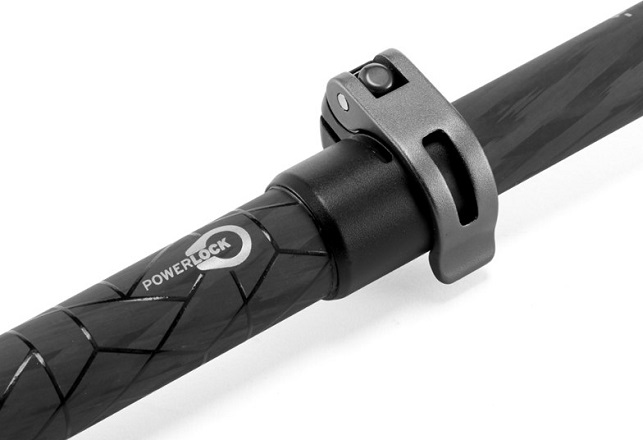
Women’s REI Co-op Flash Carbon trekking poles with Powerlock Adjustment
An adjustment wheel on a threaded piece (a fancy screw) allows tension adjustment. Some adjusters can be finger turned, some require a tool. If you have to force the lever closed or opened, the tension is too tight. When a lever is too tight on a carbon pole it could cause it to crack. If the poles collapse with the lever closed, the tension is too loose. More often than not, it only takes a quarter to half turn of the adjuster to get it just right. Note that temperature and vibration contribute to changes at the pole connections during the course of a day. It is wise to check the connections before each hike by putting much of your weight onto the pole – adjust as needed.
Metal lever locks are durable and often found on premium poles. Fiber reinforced plastic has proven to be quite durable on mid-level poles. Hard plastic lever locks (such as those found on cheaper poles) tend to develop small cracks over time. These poles are good for occasional day hike use near home but not for heavy backpacking in rugged terrain and remote locations where you need total reliability.
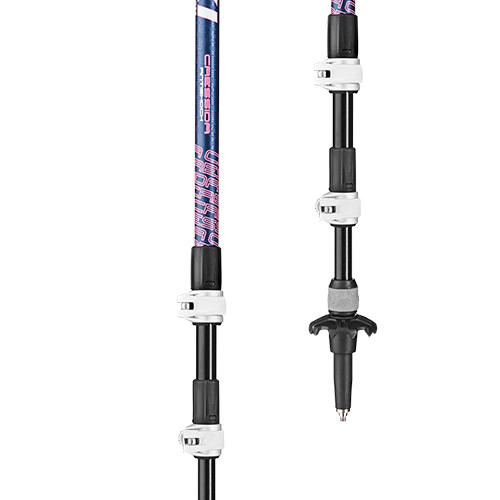 Leki Women’s trekking poles with Speed Lock 2
Lever locks are quick and easy to deploy even with gloves on. They add about an ounce to a pole over a twist lock system. Note that temperature changes can affect the tension, more so on aluminum poles, so be sure to check before use, especially on cold mornings. Check throughout the day when you stop for a break. Vibration can also cause pole junctions to loosen.
Twist Lock
A twist lock is an internal fitting on a screw which expands when you twist adjacent pole sections in opposite directions. Friction locks the poles at the length desired. Twist locks allowed the development of the lightweight, three-piece pole but can be a bit of a pain to use since you have to hold a slick pole in one hand while turning it in the other hand. Once you get used to the twisting motion it goes quickly enough.
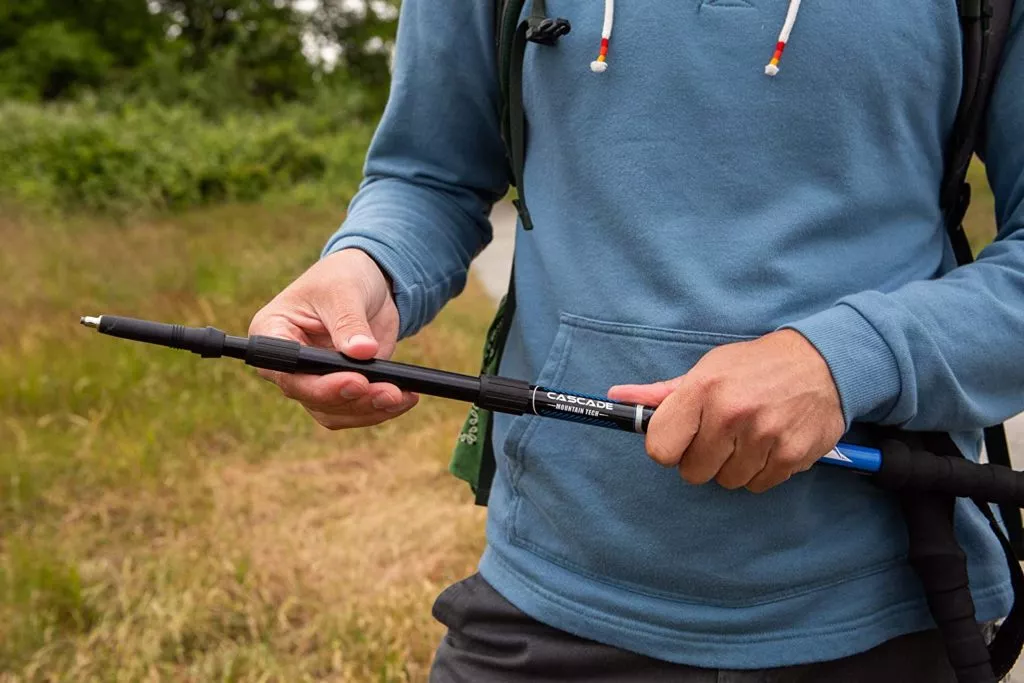 Cascade Mountain Tech Twist Lock trekking poles
However, dirt and moisture can build up inside the poles, which can result in them being stuck and no longer adjustable or reduce internal friction causing the pole to collapse (typically at a most inconvenient time).
Compression fittings tend to be used on less expensive poles yet they weigh less than lever locks. You can get some really good lightweight poles for much less than the same poles with quick lock fittings. Check the availability of replacement parts and warranty service before purchasing.
Folding Hiking Poles
Folding hiking poles can use a lever lock on the top section and a push button lock on lower sections. I have read of people having issues with push button locks, but the fix appears to be keeping the lock mechanism and hole clean. The lower sections of the pole are held in place by a super strong Kevlar cord, typically in a plastic tube sheath for protection. As folding hiking poles only take seconds to deploy and fold back up, they have strong appeal for certain hikers. However, the Kevlar cord has been known to break at friction points (despite the plastic liner) and the lower section will sometimes need adjustment due to slight cord stretch. Inspect the cords on your poles regularly do you won’t get caught with a broken cord on the trail! Also note that folding poles use smaller metal tips and rubber tips than telescoping poles.
Anti-Shock or Shock Absorbing Hiking Poles
To expand the appeal of hiking poles, anti-shock mechanisms were developed. They appealed to hikers who didn’t want any feedback to their hands (i.e., vibration). I can see the appeal to hikers with nerve ending issues, arthritis, or some other health-related challenge.
The anti-shock mechanism is most often a metal spring. Typically it becomes noisy, rattling at every strike. The mechanism adds weight and complexity. Nearly every hiker I’ve run into over the years who had such poles eventually locked the mechanism in the “off” position because they got tired of the rattling noise.
Occasionally a manufacturer (such as Leki and Black Diamond, for this example) will experiment with a new anti-shock idea.. The piece is an elastomer that absorbs shock and has no moving parts. Leki claims it can reduce shock by 40%. I don’t know anyone that has given it a try, but it sounds promising with no real downside other than adding an ounce to the weight of each pole.
Hiking Pole Metal & Rubber Tips
Quality trekking poles have a carbide or tungsten metal tip, which is very tough material that can hold up to pounding rocky trails for years. The metal tips add traction, particularly on rock, ice, and wet wood. The best poles attach the tip to the pole with a strong yet flexible material making the pole more durable and specially designed to flex up to 30 degrees without bending the pole shaft. Some flexible tips are designed to break away from the pole before the pole breaks, adding some peace-of-mind if you’re many days into the outback.
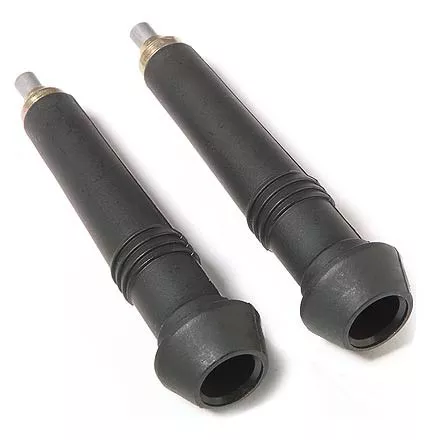 Leki Carbide Universal Flex Tips
Any hiking poles worth buying will have replaceable tips. Some are easily removable screw-on type, some are just glued on even on expensive poles. Tips do wear out over the miles, especially if you hike on a lot of rock. You may want to be sure the manufacturer has replacement tips readily available before purchasing poles, as the tips are brand specific. Some tips require a tool for replacement, so replacing the tip is something best performed at home (if going on extended trips into the outback, carry a spare tip and the tool). The glued on type may or may not be easily removed. Be aware of that before you purchase, especially if you intend to do a lot of long distance hiking and will be dependent on your poles, such as trekking pole supported tents.
Rubber tip covers are available for most poles for traction and quietness on pavement. Such tips usually just slide over the metal tip. They are fine to use on smooth trails, but a rugged trail environment will soon pull them off. Some companies, such as Black Diamond, do have rubber tips intended for trail use. I enjoy the quiet of the rubber tip covers, having reconciled that the mud will keep one sometimes. Note that folding type poles require special rubber tips that will not fit standard hiking poles.
Note that some hiking areas are now requiring rubber tips. Heavily used trails can have so many hiking pole holes that the soil is loosened enough to be easily erroded by heavy train. Philmont Scout Ranch in northern New Mexico is one notable example of where rubber pole tips are now required. As for metal pole tips leaving scratches on rock, it may look unsightly, but soon washes away with rain or snow.
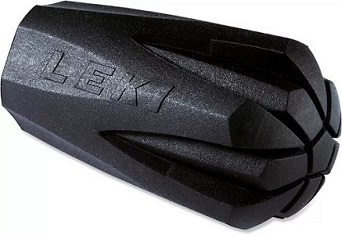
Leki Rubber Walking Tips
Leki and a few other companies also offer rubber curved foot-shaped walking-tip pieces for push-off efficiency on pavement. These rubber feet were developed for the exercise called Nordic walking, so your arms do almost as much work as your legs, enhancing the aerobic effect. Great for general exercise, but not necessarily desirable for hiking.
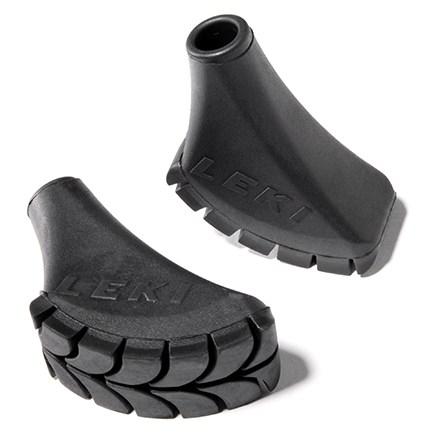 Leki Fitness Walking Tips
Hiking Pole Baskets
Baskets are typically round or snow-flake shaped tough plastic pieces located just above the flexible tip joint. They are used to prevent the poles from sinking into soft surfaces (mud and sand) or slipping into cracks between rocks or roots. They weigh very little, come in various sizes, and are easy to install or remove without tools. Note that baskets are brand specific, so you may want to check on the availability of replacements. Most baskets can be replaced with a simple twisting motion without any tools.
A trekking basket/mud basket is fairly small, about 1.6 inches/4 cm in diameter, and prevents poles from sinking deep into mud, sand, and slipping into cracks between rocks, roots, or footbridge planks.
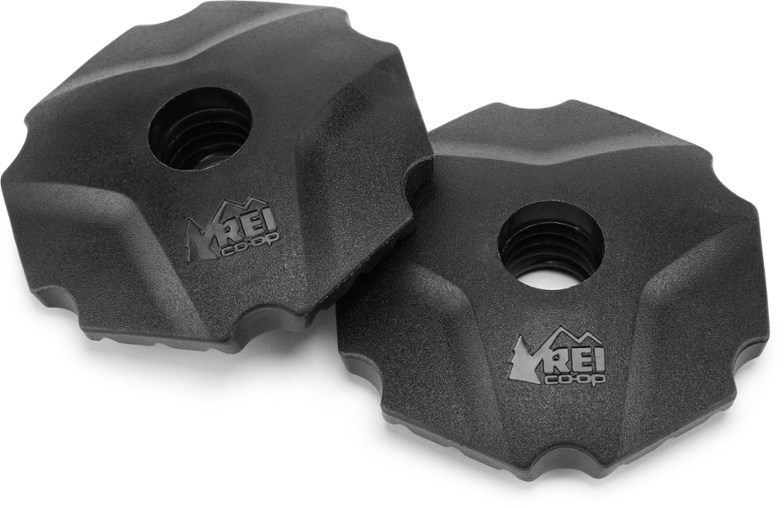 REI Co-op trekking pole Baskets for Mud or Sand
Snow baskets are much larger, about four inches/10 cm in diameter. They are sometimes called Powder baskets and are basically required for use whenever there’s more than a few inches of snow. Sand hikers also use these baskets (be sure you’re legally hiking any sand dunes as this is often forbidden on coastlines).
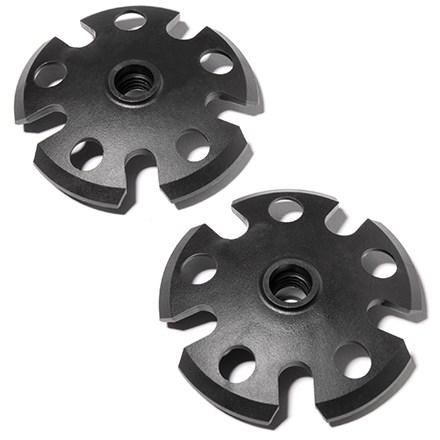 Leki Snowflake trekking pole Snow Baskets for Packed Snow and Deep Powder
Gimmicks
Quality poles focus on doing the job efficiently and don’t need gimmicks for marketing. No compass, hidden compartment, or LED light.
Hiking Pole Care
The one potential problem area with three section hiking poles is when the locking mechanism fails to work properly, in particular the twist lock mechanism. Most often the problem results from dirt buildup caused by dust inside the poles, which reduces the friction necessary to lock the pole in place. Lever locks, being outside of the poles, don’t have the same issue, but dirt buildup can make the lever stiff and inhibit the friction adjustment screw.
Give care to your poles a few times a year, particularly before and after multi-day trips. Pull the pole sections apart and inspect every piece for dents, cracks, or worn out parts. Pay particular attention to the pole locking mechanism, whether twist lock or lever lock. Plastics can develop hairline fractures over time which can fail at the most inconvenient location (most companies will repair your poles for a small fee). Pole tips can become worn and lose traction. Fortunately they are easy to replace yourself.
Clean the pole sections inside and out with nothing more than a big bowl of warm, fresh water with a drop or two of dishwashing liquid. Use a soft cloth for cleaning, especially the inside of the tubing where the poles connect.
Always rinse with fresh water and let the parts air dry before assembly.
Crucial Tips for Selecting the Best Hiking Poles for You
Choosing a set of hiking poles can become a bit confusing, especially with all the options out there. Take some time to consider how you will be using the poles most of the time. Where will you be hiking? Day hikes or multi-day backpacking trips? Local trails or the outback? Maintained trails or bushwhacking/rock hopping? Moderate weather or really cold winter weather? Would you benefit from anti-shock poles? Angled grips or straight grips? What strap material feels comfortable? What features are really the most important to you?
Flying With Hiking Poles?
Technically, TSA will not allow any hiking poles, folding or not, in carry-on luggage. I’ve heard the same for European domestic airlines. There are anecdotal instances of travellers getting away with folding carbon poles, or taking poles apart into sections for carry-on purposes, but do you really want to take a chance on your expensive poles being confiscated at the gate? Put your poles in your checked-in luggage. Or do as a friend of mine did for the Camino Trail in Spain – he went to an outfitter in Madrid and bought an inexpensive pair of poles. Obviously it depends on your destination for availability. Check with your airline before travel, especially if you are changing planes flown by different airlines.
My Take on Hiking Pole Considerations
I want highly reliable poles for a variety of terrain and weather conditions around the world. Weight and collapsed length (for travel) are considerations. But more than that I want pole locks that do not slip, wiggle, corrode, or break. I want comfortable grips and straps that won’t irritate my hands on sweaty, all-day hikes, yet can be adjusted for winter use with gloves. And I want poles that will last years, not a season.
I want poles that have a solid warranty from a company with exceptional customer service. To get all of those features, I may have to pay a bit more, but it’s worth it to me because I hike numerous times a month and do several multi-day trips per year. Peace of mind and confidence in the gear is worth the small premium. The older I get (and the worse my knees get) the more I think of hiking poles as a safety feature – my health and well-being have a relationship with my hiking poles. Also, the popularity of ultra light trekking poles tents could be a consideration if you use one (I have two).
Experienced Comparison of Hiking Pole Materials
I have hiking poles made of both aluminum and carbon fiber. My Leki Makalu Ti aluminum poles have been going strong since 2004, covering thousands of miles and dozens of trips on all types of terrain and in all weather conditions. The pair weighs 16 ounces. They have never failed or seized up, even though they use the old-style twist locks. I do clean the inside of the pole tubes once in a while, which helps the compression fitting maintain a good grip as well as to release when I want it to. The foam grips have compressed and worn down over time and not as grippy as they once were, but for day hikes they are still fine.
I have a pair of poles from Komperdell that had a twist lock fitting failure when I forced it to collapse while it was stuck in the extended position. Oops! Komperdell fixed it for the price of postage. Kudos to their warranty and customer service.
Carbon Pole Experience
My pair of carbon fiber poles (from England) were acquired when the second generation of carbon poles first came out and weigh 14.6 ounces. They also use a twist lock fitting. I only use them where I won’t be banging around boulders. They do absorb a bit more shock than aluminum but shock has never been an issue for me with any pole. The carbon poles are now more than 10 years old and have held up well.
I have had only one issue with a carbon pole and it was my fault. The lower section of the pole wasn’t all the way inside the rear hatch of my car. While talking with a friend, I absent-mindedly closed the hatch down on the pole. Snap! Fortunately, the major manufacturers keep replacement parts in stock (Leki and Black Diamond in particular), so if you break a section such as I did, it can be replaced for a fraction of what a new pair of poles would cost.
While hiking in the Presidential Range of New Hampshire during a summer trip a few years ago, one of my friends got his Leki carbon pole stuck in some super glue-like mud in a narrow space between boulders. As he had no room to leverage the pole out, he gave it a strong pull while using a twisting motion on the grip. The pole snapped right above the tip section. The carbon may have had a nick in it prior to sticking in the mud. He left the unreachable tip in the glue-like mud and hiked on using one pole.
After the trip we stopped by a mini LL Bean store inside the Joe Dodge Lodge at Pinkham Notch facility. Though my friend didn’t buy the poles from LL Bean, the manager happily replaced them saying that Leki has great customer warranty support and it wouldn’t be a problem. That is awesome service from both companies! But, it does show the weakness of using carbon fiber poles. My friend, who is a professional outdoor educator, said that would be his first and only pair of carbon poles. He chose an aluminum pair to replace the broken carbon ones.
Folding Pole Experience
Another good friend was hiking with me one spring using the Black Diamond Z folding poles. He likes to rock and boulder climb and wanted trekking poles he could quickly stash away. We hiked 5.5 miles to our destination on a moderate, mostly dirt forest trail. We took a different route on the way back, which was very rocky much of the way. His poles started to make a bit of noise each time it hit the ground. Upon inspection, we found the lower section was slipping ever so slightly. He became quite frustrated and vowed to return the poles to the store where he bought them, which fortunately has a rather liberal return policy.
I later looked into the issue with the poles he had and found out that the kevlar cord holding them together is known to stretch a hair with use and needs adjustment. It turns out the adjustment is pretty easy, no tools needed. However, it wasn’t exactly intuitive, either. Yes, my friend should have read the instructions before using the poles on a trip, but like you and me, he is human. At least he wasn’t like the guy who bought a headlamp moments before we hit the trail, only to realize that night that it did not come with batteries!
Pole Material A Personal Preference
As far as pole material, much depends on where you are hiking and what features make you happy (or irritate you the least). Besides rocks and boulders possibly damaging carbon poles, there are other considerations.
However, carbon fiber poles have been used successfully for years by experienced long distance hikers on all the major long trails (Appalachian Trail, Continental Divide Trail, Pacific Crest Trail) and all the major mountain ranges. Respect the limitations of each material, take a bit of care, and you’ll get many years of use out of your investment.
For the sake of transparency, I now use a wonderful pair of carbon fiber telescoping poles with premium foam grips. They have been superb. My older aluminum poles I loan to friends that don’t have poles. Once I show them how to use properly most promptly purchase a pair.
Next, we’ll look at how to best use your hiking poles so you can develop a synchronicity that becomes second nature.
How To Use Hiking Poles Efficiently
Admittedly, most people just grab the pole by the grip, palm first, and start walking while planting the pole ahead and picking it up as they reach the pole. The strap may or may not be used. While this technique may help you keep your balance, it adds no power to your walk and is hardly a smooth, efficient motion that uses little energy. Fortunately, there is an efficient way of using poles that has been proven over many decades.
Hiking poles are intended to swing easily along with your walking pace, in rhythm with your body. The grip of the pole is adjusted so that it is about waist high, with the lower part of your arm at a 90 degree angle when your elbow is by your side.
The motion part of using poles came from cross country skiers and snowshoers, with the pole tip set to push you forward with each step. The tip ends up behind you before lifting it to reset for the next step or glide. What is difference in hiking is the pole is shorter to take advantage of your arm’s natural swinging motion (versus having to lift the pole tip to plant it ahead of your body).
Strap Use
The strap makes a strong connection between your hand and the pole, allowing the hiking pole to easily swing forward with minimal effort. Once you have the height adjusted, hold a pole in one hand. Take the strap in the other hand and pull it out at a 45 degree angle from the pole. Now slide your hand up through the bottom of the strap. Your palm is now on top of the strap and the loop of the strap is around your wrist.
With the strap now over your wrist, lightly wrap your hand around the grip. The strap may be either too loose or too tight. Fortunately, straps are easily adjusted. Different companies use different methods for adjusting strap length so refer to the directions for your poles.
So, what strap length is just right? When you grab the grip, the strap should have just enough tension to allow you to slide your palm over the strap while holding the hiking pole with just your thumb and index finger. Now push down with your palm on the strap (amount of force is hard to feel, but say 30 pounds for an idea). Adjust the strap length so that this position – holding the pole with palm weight on the strap – is comfortable.
Use the Poles With A Natural Motion
Adjust the other hiking pole and hold it the same way. Note that straps are sometimes left and right hand specific. Hold both poles with the tip just a couple of inches off the ground. Now walk forward and allow your arms to swing naturally. Notice how the pole swings forward with your arms of its own accord. As the pole reaches the limit of its forward arc, let the tip touch the ground. As you walk forward, place some pressure on the strap and push the pole tip behind you. Move forward with a natural arm motion, and the pole will lift off the ground and swing forward again. If the pole tip catches the ground while it swings forward, shorten the pole length a bit until you can get a natural swing (nearly all poles have ruler gradations indicated on the lower pole sections). You may want to mark that point on your poles with a Sharpie.
Some hikers may prefer using a light grip on the handle, and some will prefer the fingertip grip with weight on strap method. Either way is fine. What is key is allowing the pole to swing forward naturally and then pushing off. The more efficient your hiking pole technique, the less energy you will use.
Practice using this method on smooth terrain such as your yard or a park lawn. Practice until it feels natural. Then take a few short hikes on varied terrain until it starts to feel like second nature. Depending on terrain, you will need to pay some attention to where you set the tip of the pole, being careful to avoid crevices, holes, tree roots, rocks, and other obstacles.
When using the hiking poles to help support your weight, such as taking a big step up or down, test the pole with a bit of pressure on it before committing to the step. It is wise to check the pole connections before and during the hike so you won’t be surprised by a collapsing pole.
How to Use Trekking Poles Properly Videos
Here are several LEKI videos that do a fine job of showing you how to efficiently use hiking poles. They are direct to the point and short in viewing time.
If you want to read further on the use of hiking poles, Mr. Pete Clinch of the UK is recognized around the world as the man who has taught thousands how to use hiking poles with straps most efficiently.
Peter Clinch on Trekking Poles
Cons of Hiking With Trekking Poles
I soon got my own set of trekking poles and never looked back. However, it didn’t take long for me to realize poles had a few disadvantages, too. I love to bushwhack off-trail to discover those rare gems hidden in the wilderness. Hiking poles tend to get caught up in brush and laurel. With poles in each hand, it’s inconvenient to grab the camera for that once-in-a-lifetime shot, or grab a quick snack from the hip-belt pocket. Scrambling around boulders, canyons, and rock walls means dealing with the poles first. I typically just use one pole when day hiking so I have a hand free for snacks, camera or hydration hose.
Some hikers claim that using a proper hiking pole technique helps them with speed on the flats, but my experience has been that poles slow me down on the flats. As most of my hiking tends to be in the mountains, the flats are fairly short so I just hold my poles until the next vertical change.
Flats do not mean easy hiking – flats could be rocky, boggy, swampy, muddy, or sandy. If you hike on flats most of the time, you can adjust your pole use to your hiking style and benefit forward propulsion.
Fortunately, technology for quickly collapsing and deploying poles has been developed, but you still have to stop to strap or unstrap the poles on your pack even when a friend is there to help. There are packs made by Osprey that have Stow-on-the-Go trekking pole attachment loops so you can stow a pole on the fly.
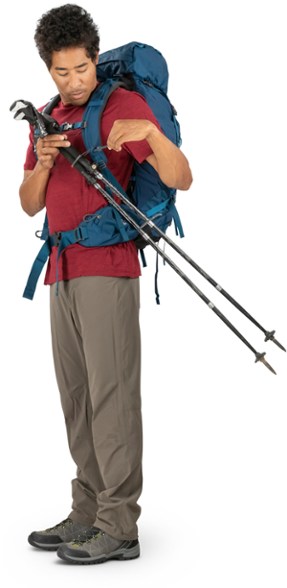 Osprey Kestrel 38 Pack – Men’s Stow-on-the-GoTM trekking pole carry attachment
Pros of Hiking With Trekking Poles
Hiking poles provide two additional points of contact with the trail, essentially converting two-footed hikers into four-legged hiking animals. With more points of contact, hikers are less likely to slip from loose footing or lost balance, and those moments are less likely to turn into falls.
Think about places that often cause one to slip on the trail: wet leaves, mud, wet rocks, tree roots, and loose rock/gravel. As you transfer weight to your foot and it starts to slip, the hiking poles can brace you despite the slip and prevent you from falling. Trekking poles have saved me from ankle sprains dozens of times.
Hiking poles reduce stress on your joints in the knees, ankles, and hips. This is particularly noticeable when going down steep terrain, taking much of the load off the knees. Several highly recognized studies (including the Journal of Sports Medicine) have shown that hiking poles can reduce stress on the knees by at least 25 percent and up to 40 percent.
Hiking Poles for Other Uses
My aluminum poles are super-handy for whacking thorny blackberry stalks out of the way, pushing prickly vines aside, and knocking down tall weeds so I won’t step on a snake. It is also beneficial for disposing of those pesky spider webs across the trail. Carbon poles are fine for spider webs, but I don’t think I’ll be whacking anything with them in case there’s rock or tree stump hiding.
I’ve read there are people that think a hiking pole can be used for defense against an animal attack. A skinny little pole isn’t going to stop a bear or wild boar that’s after you. It is quite unlikely you will see a mountain lion before it attacks you. A raccoon will probably just laugh at you.
Flipping a poisonous snake out of the way also isn’t a good idea – a 4 foot long copperhead can strike longer than the length of its body in 1/10th of a second. Rattlesnakes are only slightly slower. Snakes outside of the USA and Canada should not be messed with (or any snake in the Everglades – thinking of pythons), much less four legged predators.
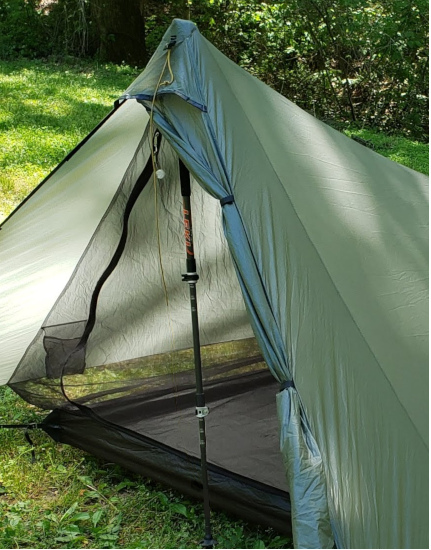
Hiking pole used to support Ultra Light Tent
Hiking Pole Use for Tents, Tarps & Cameras
In addition to being a hiking aid, poles have a number of other uses. The ultralight hiker movement makes use of tarps and tents designed to be supported by hiking poles (why carry tent poles when you have one in your hand?). Poles are handy when setting up a dining fly – put one on the table under the fly to create standing headroom. In treeless areas, use your pole (supported with rocks or pack) as a lantern hanger. A pole section can be used as an arm or leg splint for broken bones. I’m sure you can come up with other clever uses.
Some hiking poles can be used as a camera mount monopod. A standard M6 camera can mount on the top of the hand grip. It can help stabilize your camera for a long shot, but is no substitute for a serious photographer. There are clamp-on pole mounts for action video cameras (like the GoPro) and the ubiquitous Gorilla Pod for selfies.
What’s the difference between a walking stick and a hiking pole?
Of course, hiking sticks have been around since ancient times. It’s common to see sticks conveniently placed by hikers at creek crossings for community use. However, a walking stick is not a hiking/trekking pole. The philosophy of use may be the same, but the difference is how they are used and the adjustability they offer.
Ecology
There are those that believe hiking poles can cause ecological damage. As I regularly hike on some of the most heavily used trails in the USA (Georgia section of the AT), I had the same perception when poles started to become common in the late 1990s as I saw holes all along the trails and scratch marks on rocks. While hiking with a naturalist one day, he pointed out how the pole holes helped aerate the soil, hard-packed from heavy hiker use. I hiked up one of my favorite mountains after the first snow and saw that all of those little scratches on the rocks had disappeared, as had the holes. So for the most part, hiking poles cause no harm and in certain soils may even help Mother Nature.
There are places where some decry the use of poles, especially in fragile soil areas that are easily eroded. In high-use areas with such soil, thousands of little pole holes can penetrate the dirt, loosening the soil so it is easily carried away by rain runoff. There are also delicate and rare alpine plants that don’t take to being poked by a hiking pole. Be aware to notice such places – often there will be a sign noting the fragile area. The use of rubber tips can eliminate aerating the soil in sensitve soil areas like alpine tundra.
Next Steps in Choosing Your Hiking Pole
Quality hiking poles are not cheap. As your well-being during a trip can be affected by functional poles, you’ll want to get something reliable. If you’re just going to use them for one trip or once in a while, get the less expensive ones. If you’re a dedicated hiker and will use them regularly, it’s worth getting the models with premium features. Consider the investment over time in years of use and it comes out to just a few dollars a year or a few cents per mile.
The major pole manufacturers have solid warranties and really stand behind what they sell, as do some of the big outdoor retailers.
Whether you intend to buy or rent hiking poles, it is good to know a few things first to use them effectively, comfortably, and keep frustration to a minimum.
If you’re still unsure about trekking poles, borrow a good pair and give them a try, or buy them from a retailer that will let you return them (whether 30 days or 365 days) if you’re not satisfied.

Mary law
I have arthritis in my right thumb joint. Usung my pole makes it ache. Is there a good ergonomic grip.
Marcus Shapiro
Absolutely! Here you go…
Donna
I like my Kelty trekking poles. They are ambidextrous and have cork grips. They were purchased to replace a set of Leki poles. After the first set of Kelty poles malfunctioned, I had them replaced for free. There has been no problems since. I use them whenever I go trail walking.