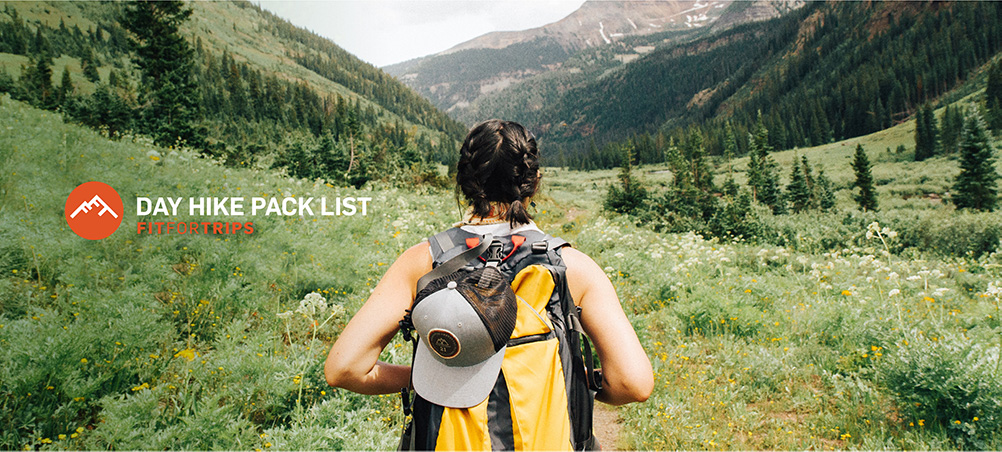
Day Hike Essentials Buyers Guide
What should I bring for a day hike?
You may be wondering what day hiking essentials you should carry in and on your pack for every day hike. The best approach to making the perfect day hike checklist is to have Essential Groups of gear. This allows you to choose what fits where you will be hiking and the conditions you expect the day of your hike. Please note we’re just referring to day hikes or training hikes, whether half day or all day and not overnight backpacking (but you never know when you may be forced into an overnight situation in the backcountry). Follow your personal Fit For Trips workout plan so you will be in shape to make best use of your gear.
Day Hiking Essentials Categories
- Short Day or Urban hike less than 4 hours. Easy self-rescue or ambulance paramedic evacuation, usually in cell phone range.
- Long Day or Backcountry wilderness hike over 4 hours. Forced overnight or Search and Rescue (SAR) remote evacuation with no cell phone signal.
SHORT DAY HIKING ESSENTIALS
ESSENTIAL GROUPS
- Skin Protection
- First Aid kit, small size
- Light source
- Hydration
- Knife
- Shelter, basic
- Navigation
- Clothing for season
- Food
PRIME ESSENTIALS
- Day Pack
- Communication
- Weather
“THE LAST” ESSENTIAL
- TP kit
LONG DAY HIKING ESSENTIALS
ESSENTIAL GROUPS
- Skin Protection
- First Aid kit, medium size
- Light source
- Hydration & Filter
- Knife / Tool sub-kit
- Shelter
- Navigation
- Clothing for season
- Food
- Fire sub-kit
PRIME ESSENTIALS
- Day Pack
- Communication / Trip Plan
- Weather
“THE LAST” ESSENTIAL
- TP kit
It’s interesting how little difference there is between the essential day hiking gear on the two lists. The main difference is the amount of food, water, clothing, and planning. A short day hiking essentials list doesn’t need a first aid kit meant for backcountry hiking. Nor does it need a water filter, full knife/tool, or fire sub-kit, but a shelter may still be needed as well as a TP kit. We’ll go into detail on each aspect of the day hiking supplies on the list so you will be prepared to make wise choices depending on the nature of your hike.
ONE-STOP-SHOP below for all DAY HIKING ESSENTIALS
1. Skin Protection
What can I say that you’ve not heard before? UV (ultraviolet) rays penetrate cloud cover. The higher the elevation, the stronger the UV rays. UV rays damage the skin regardless of temperature. Ask any skier or sailor. I now know all about UV skin damage thanks to the big scar on my cheek from skin cancer.
Sunscreen for exposed skin, or UPF (ultraviolet protection factor processed into clothing) rated clothing should be considered a necessity. I always use waterproof sunscreen because of my tendency to sweat (reapply sunscreen every 3-4 hours). Any sunscreen with a SPF (skin protection factor) lower than 30 won’t protect you for long. For the face, neck, and back of the hands (high exposure areas) a SPF of 50 or higher is warranted. Even if you have family genes that make you not prone to skin cancer, the sun’s rays still cause skin damage and will age your skin far faster. Plus, what fun is a sunburn?
Sunscreen
Use 30 SPF or higher, sweat-proof preferably. Lip balm with SPF is a day hiking essential for many. Keep one in your pants pocket and a spare in your pack. Split, cracked lips really burn when you eat that salty, dehydrated food or that wonderful spicy Mexican food after a hike.
A full brimmed hat or cap with neck cape (or bandana) are highly recommended as are sunglasses when you’re hiking in sunny, open areas, especially on snow. Again, the higher the elevation, the stronger the UV rays, which cause cumulative damage to the eyes over time. Polarized sunglasses are nice to have but not totally necessary. Lenses dark enough to keep you from squinting are important. Snow hikers should have mountaineering glasses with side shields to block side glare.
Skin Care
Whether it’s windy or cold, dry conditions can chap exposed skin, especially the face. Use of a skin protection cream (typically with added sun protection) will help prevent the itchiness of extremely dry skin. Dermatone products have long been an outdoor favorite.
Dermatone Classic Mini Tin SPF 23, 0.5 oz.
Dermatone SPF 30 Spot Protection Stick
Insect Repellent for skin
The other part of skin protection is insect repellent. It is no longer just for comfort from bites. Your health can depend on insect repellent. Between the diseases mosquitoes carry (in North America: Zika, West Nile Virus, various encephalitis strains, et al.) and ticks, insects offer plenty of opportunities to make you ill. In 2015 tests showed that DEET repelled the disease carrier mosquito Aedes Aegypti for the longest period (240 minutes). Ticks carry other diseases (Lyme disease, Rocky Mountain spotted fever, et al) and can be extremely hard to find on your body (until they’re swollen with your blood), especially the tiny recently hatched “seed ticks” about the size of a ballpoint pen dot.
Sawyer Picaridin Insect Repellent 3 oz. – won’t harm fabric or plastics or sting eyes as does DEET
OFF! FamilyCare Insect Repellent – DEET based, still very effective
Repel Lemon Eucalyptus Pump-Spray Insect Repellent 4 fl. oz. – natural oils, requires more frequent application
Tick Removal Tool
Ticks can also be difficult to fully remove once they’ve attached themselves to your skin for a few hours (see Wilderness First Aid class links above). A tick removal tool is best for getting the whole tick. Tweezers can get you by, but often leave the head and mouth parts in your skin – which just happen to be the parts that transmit disease.
Tick Removal Tools – various types
Insect Repellent for clothes
Regular use of an insect repellent on clothing and exposed skin is a necessity in many locations. Whether you use repellent with DEET, picaridin, or a natural repellent such as essential oils, citronella or lemon eucalyptus oil, it is the regular application that matters. The synthetic repellents (DEET, picaridin) have proven to be the most effective in keeping mosquitoes at bay for longer periods of time, typically 4-6 hours. Natural repellents will need another application after a shorter amount of time, typically 2-3 hours.
Permethrin is recommended for use on clothing, bedding, mesh netting, and gear (see links below). It doesn’t damage or stain synthetics as DEET can. Insect repellents will also keep away those pesky biters such a no-see-ums, chiggers, sand fleas, and with luck, black flies (maybe…they’re vicious).
Sawyer Permethrin Pump Spray – for Clothing
ExOfficio BugsAway Insect Repellent Clothing
Insect Shield Repellent Apparel
A few companies make outdoor clothing with permethrin in the fabric. Ex-Officio and Insect Shield claim their insect repellent treatment will last through 70 washes (see link below). Reports from people that use the insect repellent clothing say that is about right.
Lastly, a little tube of Vaseline has numerous uses: dry skin, skin rash (from sweaty clothes), diaper rash, and also as a fire starter when rubbed onto paper or cotton cloth. I’ve found this item to be a day hiking essential.
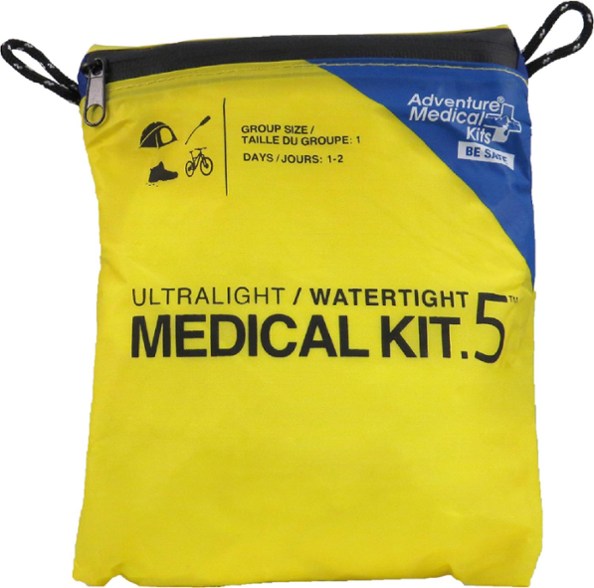
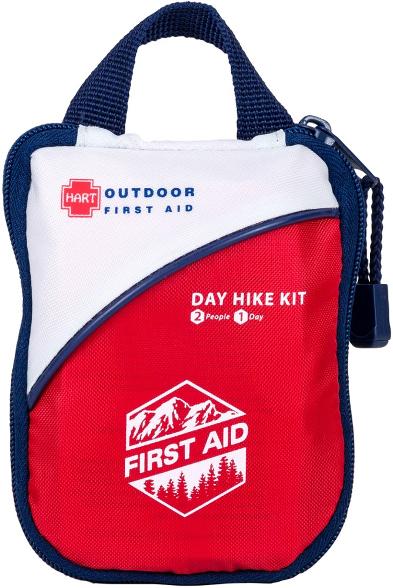
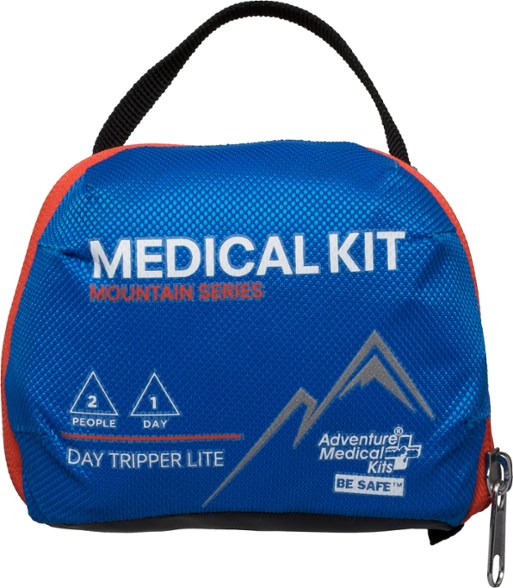
2. First Aid Kit
A shorter local hike may only call for a First Aid kit in the car but don’t laugh that I carry a mini-kit all the time, usually to treat wounded hikers I find on the trail. For wilderness hikes, it’s easiest to buy a comprehensive, ready-made kit such as those offered by Adventure Medical and REI. For hikes in the backcountry take the real deal that can handle more than a small cut. Quality wilderness first aid kits will also have a First Aid fundamentals card to augment your knowledge.
Personal First Aid kits
Adventure Medical Kits Ultralight/Watertight .5
HART Outdoor Day Hike First Aid Kit
Adventure Medical Kits Mountain Series Day Tripper Lite
3. Light Source
The classic LED headlamp can’t be beat for its ease of use, convenience, light weight, and small size. LED lights are durable and last a long time. You can get by with a LED flashlight, but with LED headlamps costing only $20, why not have one in your pack? I prefer models that are waterproof, have an on/off/mode switch that is easy to find and use, and uses AAA batteries (because I have a bin full of rechargeable batteries and always carry a spare battery set, which I highly recommend). Good ones will have a flashing mode for emergency signaling as well as high and low beam modes. If you need a list of reasons why you should carry a light, please don’t go into the wilderness. I’ve had to use mine while hiking after sundown more times than I care to remember (the animals hike at night, too, but generally run away from light, with deer and skunks being the exceptions).
LED Headlamps
Black Diamond Spot 350 Headlamp
4. Hydration
Your body can go 2-3 weeks without food, but you can’t go very long without water; maybe three days, but functionally more like 1.5 days. Without water your body is unable to function properly – it can’t digest food for energy adequately, brain chemicals become disrupted, and so it goes. If you’re participating in a vigorous hike, your body will need a liter or more every two hours. If you think that sounds like a lot of water, it is. Whether you’re aware of it or not, your body can easily sweat out a liter of water per hour when the going gets tough, and you’re losing the chemical electrolyte balance your body needs.
Carry a minimum of two liters of water and drink regularly, long before you get thirsty. According to the experts in such things, if you get thirsty your body is about two hours behind in adequate hydration. Ideally, also carry a bike bottle or sports drink bottle with electrolytes to sip once in a while (I like to water down electrolytes a bit, as my stomach doesn’t tolerate the high sugar content very well). Some sports drink tablets contain caffeine – check the label before using them.
Hydration Bladders – add to any pack that is hydration ready (bladder sleeve)
Most hikers have found the best way to stay properly hydrated is by using a hydration system, i.e. a bladder with hose. I’ve found that I drink twice as much water due to the convenience of a hose over my shoulder than I do when I only carry water bottles. A hydration system can be added to most modern day packs, or you can buy an Osprey or Camelbak pack that comes readily equipped. Backpackers typically carry a 2-3 liter version for use around camp. The Sawyer mini-filter comes with such a bag, making it easy to refill your pack’s bladder.
Platypus Big Zip EVO Reservoir – 2 Liters
Osprey Hydraulics LT Reservoir – 2.5 Liters
CamelBak Crux 2L Reservoir – 2 Liters
Collapsible Water Bottle With Clip
A good backup device to carry in case your water bladder springs a leak (you do have duct tape in your kit, don’t you?) is a collapsible water bottle. These small, light, folding containers come in various sizes.
Platypus SoftBottle Water Bottle with DuoLock Cap – 34 fl. oz.
When you stay properly hydrated, you will find it necessary to heed the call of nature with a “natural break” on a regular basis. If you go for six hours without needing a restroom break, you are most likely dehydrated (in my opinion, going more than 4 hours is reason for concern – it indicates the hiker is well on the way to dehydration). A dehydrated body becomes much less efficient at converting food to energy, which robs you of vital energy.
One thing I’ve discovered with proper hydration is I feel better after a hike and much better the next day. Sure, I’m tired and maybe a bit sore, but I don’t get the “hangover” effect. Ibuprofen alleviates the soreness.
Longer day hikes require researching water replenishment sources in advance of your hike (of course you studied the trail map well before the hike and are prepared, right?) or carrying 8-10 pounds of water (desert hiking, the Grand Canyon). Water replenishment sources usually require treatment. It’s very risky to trust unknown springs coming right out of the ground, much less open water sources. Guide books for popular hiking areas typically identify high quality water sources that can be used without treatment. However, things can change the underground water quality over time due to such factors as mining, drilling, farming, or defoliant spraying (done prior to logging). Viruses, bacteria, and parasites in the water source are not things you want to gamble with while in the wilderness.
Treat the water before drinking. Common, effective chemical treatments include chlorine dioxide tablets, AquaMira drops (popular with long distance hikers) and iodine tablets (leaves an aftertaste). Such treatments require exposure time before drinking, so check the directions before using (see links below).
Chlorine Dioxide water treatment tablets
Potable Aqua Chlorine Dioxide Tablets – Package of 30
Katadyn Micropur Purification Tablets – Package of 30
Water Treatment liquid solution – very popular with long distance hikers; 2 part solution has no aftertaste
Aquamira Water Treatment – 1 oz.
Iodine tablets – Potable Aqua with flavor neutralizer
Potable Aqua Water Purification Tablets With PA Plus
Water Filter
The lightweight hiker movement has spawned some very effective and small water filter systems. Sawyer makes small, inexpensive, lightweight, portable filters that work by gravity or water bag attachment that make filtering water a breeze. Many long-time hikers are likely to have a water filtration pump which can quickly put out several liters of water. However, filter pumps require keeping the filter clean and keeping the intake hose separate from the outflow hose; in addition, they weigh more and take up more space. For group hikes and remote long distance hikes filtration pumps are ideal.
Sawyer Mini Water Filter with squeeze bag – lightest weight effective unit
Katadyn BeFree Collapsible Water Filter Bottle – 33.8 fl. oz.
Hydroblu Versa Flow Water Filter – screws onto standard soft drink bottles, protective caps on both ends
Water Filtration Straw
A handy emergency backup is a water filtration straw. They take up practically no space and are inexpensive. No reason not to carry one even on a short day hike.
Aquamira Frontier Emergency Water Filtration and Straw
UV Treatment Purifier
UV water treatment devices (such as the Steripen) had a short span of popularity, but battery usage and lack of rugged reliability doesn’t fit well with a wilderness setting. They’re quite handy for international travel, though.
Katadyn Steripen Adventurer Opti UV Water Purifier
There are water filtration bottles, but I find them bulky and lacking capacity for hiking purposes. They’re best used at home or the office.
5. Knife and Tool sub-kit
One of the most classic day hiking essentials is a knife. Over the past 20 years, multi-tools have become very popular. A knife blade 2 inches long is all that is needed for day hiking. Repair wise, multi-tools that include a knife, both Phillips and flathead screwdrivers, a can opener, and pliers can be handy. Other multi-tool options may include a hole reamer, saw, scissors or corkscrew.
It’s better to keep the multi-tool fairly small and lightweight. Get a tool that fits the needs of your gear and keep it at that. There is no need to lug around a hefty mini-toolbox. Make sure you get one that is well-built and dependable.
The standard classic Swiss Army knife covers most bases, sans pliers. The Leatherman Juice series is small, lightweight, and covers all the bases.
Multi-tools
Swiss Army Knives – a classic now in numerous versions
Leatherman Multi-Tools – the modern multi-tool in several lightweight versions
Duct tape has proven over the years to be invaluable to untold numbers of hikers. It can be used to repair a torn rain jacket, a broken trekking pole, or a blown out hiking shoe. Duct tape is available in mini-rolls, but the classic hiker method is to wrap strips around a water bottle. Gorilla brand duct tape is a modern version of the old classic.
A tape that is better suited for fabric repairs is Tenacious Tape. It comes in clear as well common tent and rain jacket colors.
Repair tape
Gear Aid Tenacious Repair Tape – works very well on rain gear, tents, tarps, packs and any fabric gear
Duct Tape – available at home supply, auto parts, hardware, and big-box stores
Gorilla Tape Handy Roll, 1-Pack, Black – 1 inch wide is the best adhesive going
6. Shelter
For short day hikes, shelter may seem like overkill. However, if there is an injured hiker or hypothermia victim that can’t be moved, you’ll need something to protect them from the elements until help arrives. An emergency rescue blanket, which reflects back body heat, weighs only a few ounces and is very small – there’s really no reason not to carry one. Though thermally less efficient, a plastic lawn bag is a waterproof alternative.
For unplanned overnight stays, an emergency bivy bag weighs less than four ounces. It also works on the reflective body heat principle so it will keep the heat from your insulation layers close to you instead of radiating out into the cold.
Emergency Blanket
S.O.L. Survive Outdoors Longer 70% Reflective Escape Lite Emergency Bivvy
SOL Emergency Blanket – the traditional emergency blanket
Tarp
Unplanned overnight stays will typically call for some kind of shelter. Carrying a small plastic sheet or lightweight silnylon tarp (silnylon is silicone impregnated nylon; waterproof, very lightweight yet amazingly strong) will make any emergency overnight stay much more bearable (when I first started backpacking, all we had was a plastic sheet tarp; we couldn’t afford a tent). In windy or rainy weather, just having a quick tarp setup can make a lunch stop much more pleasant. I like to carry an 8 ft. x 7 ft. silnylon tarp. It weighs less than one pound and when it’s packed, it is smaller than a rain jacket.
A flat, rectangular tarp has the most setup options. Set up with a trekking pole and some guy lines for a windbreak, dry dining area, or overnight shelter. Practice this at home or the local park as a fun learning experience before you encounter emergency use. You may feel clumsy the first few times, but after a few tries you’ll be able to get a good setup in just a few minutes. There are a number of good YouTube videos on tarp setup.
Aqua Quest Guide Camping Tarp – 100% Waterproof Ultralight Ripstop SIL Nylon Backpacking Rain Fly
ESCAPIST TARP – Ultralight and compact. Made from tape seam-sealed waterproof 15 denier Ultra-Sil™ Nano™
Cord
Of course, to set up a shelter you’ll need some cord (often referred to as “paracord” – originally used on parachutes). I consider cord an essential for the day hike pack list right up there with duct tape – they both have so many uses. A 30-50 foot length of cord takes up little space and weighs only a few grams per foot (see links below). I prefer the 550 pound test version as it is more versatile than the lighter stuff. You never know when you may need the cord to effect a leg splint, arm sling, a rescue from a river, or haul a bundle of firewood. For tarp setup, you’ll need several 8-10 foot lengths. For stakes, use sticks and/or rocks. I carry a few super light titanium stakes just to save on setup time.
A clever way to always have paracord with you, even if you forget to add it to your day hike pack list, is the “survival” bracelet. Wear it or clip it to your pack.
Paracord – assorted types; 550 pound test is preferred
Paracord Survival Bracelet – comes in an array of colors
You’ll also need to know a few knots (most used: square knot, sheet bend, two half hitches, truckers cinch, bowline). You’ll look really clever if you know these basic camp knots; you will also save yourself a lot of frustration caused from using made-up knots that don’t work. There are free phone apps that teach the basic knots. Carry a piece of cord with you and tie some knots while waiting in line, at an office appointment waiting room, or while waiting at a long stoplight.
7. Navigation – Map & Compass
Despite our societal tendency to have the latest electronic devices using GPS satellite signals – although I do love the Garmin Fenix 6 watch – there is no navigation device more reliable or useful than a good trail map and having a compass to properly make use of the map. Maps and compasses take up little space, weigh very little, and are indispensable when batteries die and there is no GPS signal. Keep your map and compass in a waterproof, heavy Ziplock bag or something similar. Having a backup map in a different part of your pack isn’t a bad idea, either. I’ve had more than one map rain-soaked into pulp. We are not discouraging you from using a GPS hiking watch like the Garmin Phenix 6 in addition to map and compass.
Take time to study the trail map in advance. Hopefully it will show elevation contour lines. If not, augment it with the USGS (United States Geological Survey) topo map for the area. Try to use the latest version of the trail map. Even then, beware the trails shown on the map may not be accurate (trails disappear from neglect, forest fires, storms, landslides, etc.). You may have to navigate a different route (trees that have blown down, avalanches, flood damage); this is a good reason to carry a compass. Locate water sources for refilling your drinks (assume water treatment will be needed). For more detail on Wilderness Navigation, see our article here .
A part of navigation is creating a Trip Plan (itinerary). Leave your basic trip plan including your starting point, the trails and/or area where you will be hiking, and the timeline that includes start and return time with a friend or family member. If you’re not back by the designated time, make sure they have the proper emergency contact phone number for the agency in that area such as the county sheriff, Forest Service/Bureau of Land Management office, state park or National Park Service office, Department of Natural Resources or Wildlife Management office.
Leaving a note on top of your car’s dashboard with return time and hiking location/destination can serve as a backup (which I’ve been known to do while exploring outside of cell phone range). At least the authorities will know where to look for you.
8. Clothing
The weather forecast should give you a pretty good idea of what clothing to take on your hike. Adjust it accordingly. A wide range of temperatures is typical for most times of the year (except for summer in non-mountain and non-desert areas).
Next-to-skin base layers should be quick drying synthetics or merino wool. There’s nothing like sweaty clothes with layers of dried salt sawing away on your skin to rub you the wrong way. Friction is your enemy, thus close fitting boxer briefs or similar (compression shorts) work best for most people. For women, your mileage may vary, but clothing chafe should be addressed and avoided, period. The key is material that wicks moisture away from the skin quickly. Use an anti-chafe skin lubricant such as Bodyglide if you have a problem with clothing chafe.
Mid-layer clothing should be quick drying synthetic or merino wool of the appropriate weight for the conditions expected (shorts, long pants or zip-off leg pants). Cotton is not recommended as it soaks up moisture and takes forever to dry. A cotton t-shirt soaked by rain will leave you chilled and wet. There is a reason this outdoor saying is now a cliche: “Cotton kills.”
A summer or fall desert hike probably won’t require a rain jacket, but a wind jacket and warm vest might be good to add to your day hike pack list in case you get caught out after sunset. I have a lightweight wind jacket (3.5 ounces) about the size of my fist that remains in my day pack. It has saved me from discomfort more times than I can remember. Good ones are also water repellent and can hold up to a brief shower.
Rain gear is needed in the majority of the USA, depending on the time of year – it doesn’t have to be fancy, just dependable. If you’re hiking hard, you’re going to sweat inside even the most expensive waterproof/breathable jacket. I know more than a few AT (Appalachian Trail) thru-hikers that ditched their nice, fancy rain jackets for a cheap plastic poncho in order to get better air circulation. A rain jacket with a decent hood and pit zips can be purchased for under $100. Nicer rain jackets with a lot of features such as a great hood and full side zips cost around $250.
Cool weather and mountain hiking require an insulation layer and a windproof layer (soft shell materials have it built-in). An August thunderstorm in the Blue Ridge Mountains can drop temperatures into the mid-50s in no time, which just happens to be the temperature range where most hypothermia situations occur (severe cooling of body core temperature). Western and northeastern mountain ranges can get sleet, hail, and snow any month of the year. Include strong winds and you are talking about a wind-chill near or below freezing.
Jackets with modern synthetic insulation will keep you warm when damp from rain or sweat and dry out quickly. Primaloft and Climaloft are commonly used insulation materials in such outerwear. Most are made with lightweight shell materials that are treated to be water resistant. Alternatively, a windproof fleece or softshell jacket can be used, but takes up more space in your pack. You want layers that can quickly be adjusted when the weather changes and are compressible to reduce needed space in your pack. A medium weight jacket along with a lightweight vest are more versatile and typically warmer than one bulky, heavy jacket; they will also dry out faster than a thick jacket.
I am particularly fond of The Buff, a polyester cloth tube that has numerous uses. One place cotton is acceptable is the traditional bandana, which also has numerous uses (why not carry two or three, so you can have a wet one and a dry one).
You should always carry an insulated cap and lightweight brimmed cap or hat, lightweight gloves (at a minimum), and spare set of hiking socks (see link below) in all but the warmest conditions or very short hikes. Again, the materials of choice are synthetics or merino wool.
Liner Socks
Liner socks – merino wool, polypropylene
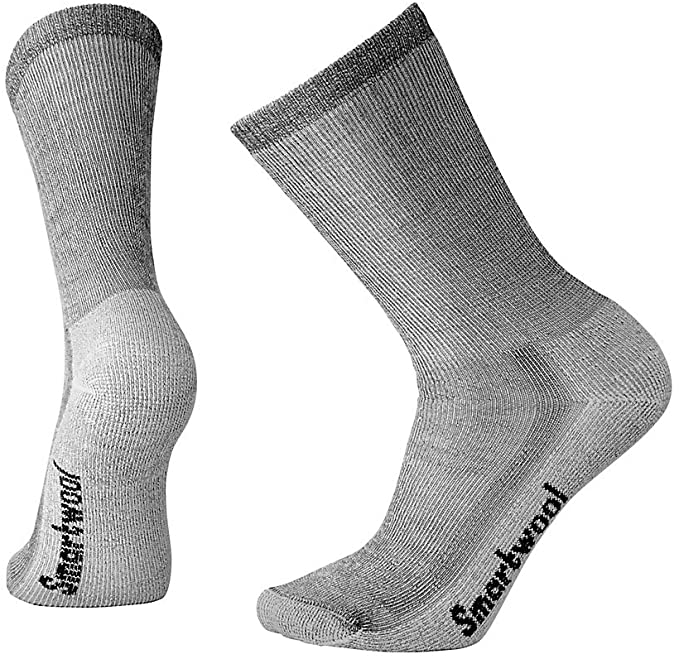
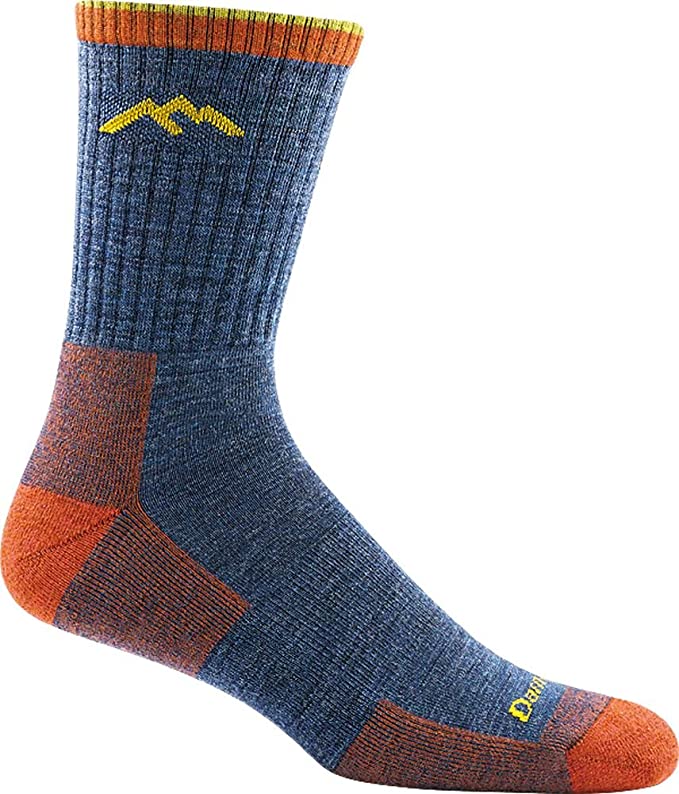
Hiking Socks – merino wool
Smartwool Socks
Darn Tough Socks
REI Merino Wool Socks
The footwear you choose should be suitable for the hiking area. It’s amazing how many people don’t understand this until they have wet feet or a blister. Trudging through snow fields in running shoes usually doesn’t result in happy feet. Wearing heavy leather boots on a hot, humid coastal hike is no fun, either. Rocky trails in boots with no shock absorption are a real pain. Proper footwear is definitely a day hiking essential essential item. Consult an outdoor footwear specialist for proper footwear fit, support, and durability. This is one place where saving money on the internet is not worth the price you’ll pay for poor fitting, improper footwear (see our article on Blister Prevention and Blister Treatment ). One shoe can do most things fairly well if chosen properly.
9. Food
Your body stores about two hours worth of easily accessed glycogen as a quick source of energy. After that, low aerobic activities (flat-land hiking) start to burn stored fats for energy. Higher aerobic activities still want easy energy – food quickly converted to glycogen, i.e. simple carbohydrates (energy gels, bananas, dried figs, Probar, Clif bars, etc.). When your body keeps demanding what you don’t have to give, you will start to experience a classic case of “bonk” – very low blood sugar (also referred to as “hitting the wall”). You’ll become lethargic, mentally confused, physically unstable and even emotionally out of sorts – your body no longer has any gas in the tank. Ironically, the appetite will wane, making it a challenge to eat when you most need it.
When glycogen stores are depleted, it takes a while for the body to process food and put energy back in the tank. Once a hiker “bonks,” it can take 1-2 hours for food intake to convert to the energy needed to get them moving – and that’s if you can get them to ingest what is needed as simple carbohydrates. Electrolyte sports drinks can help, but there is no substitute for solid food to kick internal energy production back into gear. The last bonked hiker I aided while hiking in the mountains of Utah took two full hours to recover before he could start walking again. That was a serious case. The sooner the hiker stops to address the situation, the sooner they will start hiking again.
How do you avoid bonking? Prepare your body by eating a balanced meal high in calories the night prior to your hike. Eat a hearty breakfast a couple of hours before your hike. Take in carbs regularly throughout your hike, preferably with some protein and fat mixed in (protein converts to energy at a slow, even rate). Dried fruit (apples, apricots, pineapple, figs, etc.), nuts, performance bars (Clif, Powerbar, Kind, etc.), even chocolate (M&Ms in trail mix being a classic example) are common examples of trail food. Take something that tastes good, and you’ll be more likely to eat it while on the trail. At the first break stop while on a climb of Mt. Rainier, our guide — a famous Mt. Everest climber — surprised us not with standard performance food, but with Coca-Cola and Snickers bars!
Generally, you’ll want to snack on energy food starting before you hit the two hour mark. For many hikers, that means eating on the move, which is exactly why I prefer a day pack with hip belt pockets. When it’s convenient, I’m more likely to maintain food intake to keep my energy levels up. It’s a good idea for most day hikers to stop every couple of hours for a break to let the blood circulate out of your feet and lower legs. Long distance hikers have had their bodies trained into hiking hours at a time but will benefit from regular stops throughout the day.
In addition to short breaks every two hours, I still prefer to take a longer lunch break to let my body rest and recharge. In the winter I’ll often take a mini-stove for hot water – nothing like hot tea, soup, coffee, or hot chocolate on a cold day to help renew your energy and spirits.
Lunch should have a fair bit of protein and some fat (nuts, meat, cheese, soy, peanut butter, et al), along with a mixture of simple and complex carbohydrates. Olive oil has the highest caloric value per ounce of any food; drizzle some on your sandwich bread. Peanut butter is a distance hiker classic, whether on bread or a tortilla. Apples, oranges, and bananas are great additions (carry banana and orange peels out with you).
You’ll have to experiment a bit to see what your body’s energy needs and food tolerances are. One thing to be a bit wary of is too much sugar intake. High sugar intake can unsettle the stomach as well as slow the processing of other needed nutrients. For that reason, I only use energy gels (little portable packets of primarily gelled sugar) as a last resort, as I’ll be due for an upset stomach shortly afterwards.
Just in case you get “turned around” and wind up at the car a couple of hours late, always take some extra energy food such as a couple of extra Cliff bars, nuts, and dried fruit; all foods that need no preparation or cooking. If you wind up being forced to spend an unplanned night in the wilds, having some food will keep your energy and spirits up until you can get back. For a half day hike, carry food to get you by for another 2-3 hours. For an all day hike, carry enough food to get you through the night and back to the car the next day. Be wise and be safe.
10. Fire sub-kit
A long day hike in the wilderness can become an overnight endeavor without warning. The ability to make a fire is a skill best learned in ideal conditions instead of when your life may depend on it. Whether for warmth or cooking, a fire will keep your spirits up and the night animals away. There are numerous books and YouTube videos on how to start a fire. Have fun practicing in the yard or on the BBQ grill.
Two things you need to carry: something to create a spark and kindling to catch fire. The ubiquitous plastic lighter is the obvious choice, but also carry waterproof matches in a waterproof container as a backup (not the cheap matches from the corner store).
Waterproof Matches
It’s a good idea to also carry a fire-steel striker, which takes up almost no space and is very light and inexpensive. However, knowing how to use one to get a fire started is another matter that is best learned at home.
Fire Striker
S.O.L. Survive Outdoors Fire Lite Kit (Pack of 2)
Fire Starter
Regardless of how you get a spark, having fire starting kindling is the key to getting a fire started. Don’t rely on nature to provide it, though you will need to find source wood to keep the fire going once you have a flame. Fire-starters can be bought as nuggets, cubes, and sticks (most are sawdust and paraffin, and some are hexamine chemical tablets which are expensive but work very well). Some prefer candles.
UCO Sweetfire Fire Starter Tinder
However, it’s cheaper and much lighter weight to bring your own. Lint from the clothes dryer is a classic. Waxed paper is also good and is waterproof, but the best of all is a little DIY (do it yourself) project: cotton balls soaked in Vaseline (petroleum jelly).
The little blobs of goodness will catch fire in rain, snow, and standing water. One soaked cotton ball will burn for about 15 minutes or more. They last a long time – years, if not decades – when sealed tight. You only need to carry 3-4 at a time. I can fit three in a small plastic pill jar. For about $3.50 you can make several dozen and give some to your hiking buddies.
To create, get a bag of cotton balls (100% cotton) and a jar of Vaseline (petroleum jelly). Put a sauce pan with a few heaping tablespoons of Vaseline on the stove on low heat. Once the Vaseline melts into liquid (you don’t want it to boil), dip a few cotton balls into the pan and wait a few moments while they soak up the liquid Vaseline. Remove with tongs or a fork and set on a piece of aluminum foil or wax paper (easier than cleaning a cookie sheet) until they cool off. Don’t forget to turn off the stove. Take one outside (so you don’t set off the smoke alarm), place it on a fire-proof surface, light, and watch how long it burns. Now you can have confidence that it will work in the wilderness.
Cotton Ball Vaseline fire starter video – make your own for pennies; totally reliable in heat, cold, and wet
PRIME ESSENTIALS FOR YOUR DAY HIKE
A. Prime Essential – Day Pack
It is assumed you will be carrying a day pack of some kind, whether it is a traditional shoulder-mounted day pack or large capacity fanny pack. A 15 liter day pack can handle most lower elevation summer loads (i.e., no cold weather clothing). A 25 liter day pack can handle most cool weather loads and summer mountain loads (but not snow gear-type loads; you’ll need something bigger for those crampons and snowshoes).
Many models come in men’s and women’s versions. Some packs come with hydration, which is easily added to others with a water bladder system.
Basic Day Packs hydration compatible (hydration bladder not included)
Osprey Daylite 13 Pack (Dual water bottle side mesh pockets)
Osprey Tempest 20 Pack – Women’s
REI Co-op Trail 25 Pack – Women’s
B. Prime Essential – Weather Forecast
Regardless where you are hiking, weather is subject to change, no matter what the weather forecast says. How many of those forecast 30 percent chance of rain days actually had rain? Many more than 30 percent, in my experience (someone, somewhere is going to get that 30 percent chance of rain). Thunderstorms can build up right over you. Gale force winds can sweep in from distant storms or a fast moving frontal system. Downslope winds can suddenly appear (Santa Ana winds). Lightning can strike out 25-50 miles ahead of a storm (recorded by a Forest Service ranger in New Mexico just a few years ago). Flash floods occur dozens of miles away from the rain source, and of course, mountains make their own weather and are subject to special advisories. Typically, the weather forecast for towns nearest the mountains will receive mountain weather advisories. There are also special mountain weather forecasting websites that interpolate data from remotely located National Weather Service stations. Use the weather resources available for the region where you plan to hike and be prepared for the unpredictable. Just remember, a weather forecast is based on odds and much like gambling it’s not a sure thing.
Weather for mountains. Check the forecast for your planned hike area.
Mountain Weather – covers western mountain states
Mountain Forecast – covers numerous mountain ranges worldwide
C. Prime Essential – Communication
Trip Plan
Create a basic trip plan/itinerary that identifies where your hike will start, the trails and/or area you will be hiking, and the timeline with your start and return time. Leave this information with a friend or family member. If you’re urban hiking, just text or call a friend and let them know where you’re going and when you’ll return – be sure to let them know when you arrive back at the car. If you’re not back by the designated time, that person will have the proper emergency contact phone number for your destination such as the county sheriff, Forest Service/Bureau of Land Management office, state park or National Park Service office, Department of Natural Resources, or Wildlife Management office.
Whistle
Whether you are urban hiking or backcountry hiking, anything can happen. A simple communication device is the most reliable and easily heard: a whistle. An injured hiker with broken ribs can blow a whistle and it will get people’s attention. In urban areas, there are other safety reasons to carry a whistle.
Whistles for Life Tri Power Whistle
Buckle-clip Whistle
Many modern day packs have whistles built into the chest strap. The same type of buckle strap whistle can be retro-fitted to many older packs. It’s easy enough to clip a whistle to your pack or jacket. You want the emergency whistle to be easily accessed if you are lying on the ground injured and in pain. Note that rescue whistles do not have a little ball in them so they’re effective even when wet.
Gear Aid sternum strap whistle kit
Signal Mirror
Backcountry hikers should also have a small mirror for signaling in the distance. SAR (Search And Rescue) teams look for flashes of light from a mirror. Those conducting an airborne search are more likely to see the flash from a mirror than you. Only a big fire with a LOT of smoke will get more attention. Experiment using the mirror with a friend some distance away. Rescue specific mirrors will have a hole in the middle to make aiming easier.
Coghlan’s Featherweight Mirror
Personal Location Beacon
(both require registration and one of several service plans)
There is no reason to think you will be rescued unless you left a trip itinerary with friends/family and are overdue, or use a Personal Location Beacon (PLB), such as a Spot satellite device. If you left a note on the car, it might be a few days. Otherwise, you’re on your own!
Garmin Inreach Mini – 2 Way Satellite Communicator
Cell phone
Communication is usually available in urban areas and near highways, but rarely in the backcountry. In addition, there are spots in urban areas that can’t get a signal, such as a ravine or bottom of a cliff. Cell signal locations can be tracked if someone knows to look for you. Don’t assume the cell phone is going to be your rescue device.
“THE LAST” DAY HIKING ESSENTIAL
There is one item I consider essential even though I have never seen it mentioned on a Day Hiking Essentials list – toilet paper. If you’re new to doing your business in the wilderness, take a moment to read this article on human waste in the backcountry and the Leave No Trace guidelines. I also highly suggest reading this classic book by Kathleen Meyer. In addition to following the Leave No Trace guidelines, check with the land manager for the area where you’re hiking about any human waste restrictions, especially if it’s heavily used by hikers or is located in an above tree-line alpine environment.
Generally, areas with a good amount of soil and regular rainfall break down human waste fairly easily when buried. Alpine environments (rocky, little soil, or permanent snow fields) take a long time to break down waste which is why many such areas have a “carry it out” policy using a “blue bag” or “wag bag.” Alpine climbing areas such as Mt. Ranier, Mt. Hood, and similar popular alpine climbing mountains have strictly enforced “carry out” policies. Indeed, many such areas will give you a “personal waste kit” along with your climbing permit. Don’t leave sanitizer wipes or women’s hygiene products – those must also be carried out. Take a spare Ziplock bag for such products.
Keep your TP in a Ziplock freezer bag or similar heavy duty waterproof bag. I recommend taking two small rolls versus one big one (a small roll is about ⅓ of a normal roll) and here’s why: I know more than one person whose TP roll took off downhill in a wind gust. My brother-in-law had his TP roll only a few feet away, into a pouring rain. Little good a soaking wet pile of pulp can do!
You’ll also need a trowel to properly dispose of the toilet paper via cat hole. No one likes seeing “white TP flowers” along the trail. A small bottle of hand sanitizer in your kit is also a necessity. Something to treat “diaper” rash caused by sweat may be well appreciated, too.
TP Kit Items
Trowel – for digging a cat hole
Coghlan’s Backpacker’s Trowel – the classic, made of high impact polystyrene, weighs 2 ounces
GSI Outdoors Cathole Sanitation Trowel – made of polycarbonate, about 3 ounces
TheTentLab The Deuce #2 UL Backcountry Trowel – made of aerospace grade 7075 aluminum, 0.6 ounces (17 grams)
Sanitation Bags
Cleanwaste GO Anywhere Toilet Kit Waste Bag
Biffy Bag Pocket Size Disposable Toilet, Classic – reviewers sing many praises for this one
Survival Kit (contains many of the items mentioned above)
There are actually some pretty good survival kits out there that provide many of the basic essentials for your day hike pack list: knife, whistle, mirror, fire starter, mini-compass, waterproof matches, small LED light, and more. When you consider all the gizmos you get with such a kit, they’re a pretty good deal. In fact, I may get one to put in my alternate pack so that I don’t have to move things back and forth. No kit has everything you’ll need and thus needs to be augmented with additional items. However, the SOL Scout Survival Kit is a good place to start and for that they are ideal.
Survival Kits
Companies seem to remarket these every year leading to name changes, but they’re easy to find online.
SOL Scout Survival Kit
Please note that all the gear in the world doesn’t matter if you don’t have the knowledge and experience to use it.
Take a wilderness navigation class (also see our Fit for Trips Wilderness Navigation article ), a Wilderness First Aid class, or for real fun a Wilderness Survival class.
The most important aspect of First Aid is knowing what to do, and for that there is nothing better than participation in a general First Aid class. Far more appropriate is the two-day Wilderness First Aid certification class – it will give you the proper skills and a much deeper respect for wilderness medical, EMS, and Search and Rescue (SAR) personnel. Most hikers really have no idea of all the weird stuff that happens on the trail, so be prepared (I’m talking about stuff that would never be in a movie because no one would believe it).
Now that you’ve thought, “That can’t happen to me,” consider the fact every injured, stranded, lost, and rescued hiker has said that very thing – it’s only human to think that way, but we can train ourselves to think ahead and plan accordingly.
Education
Wilderness First Aid certification classes
NOLS-Wilderness Medicine Institute – (WMI) various locations regionally
SOLO – Wilderness First Aid (WFA) Course
Landmark Learning – Choose from among nationally-recognized certification courses, located in Sylva, NC
Wilderness Survival Schools & Classes
All of these are highly regarded by outdoor professionals:
Wilderness Awareness School, Duval WA
http://wildernessawareness.org/adult/wilderness-survival-basics
Boulder Outdoor Survival School, Boulder CO
Mountain Shepherd, Catawba VA
Moreover, you might know how to use all of your gear, but it might not matter if you’re not fit for your trip so be sure to follow the personal workout routine prescribed for you by Fit for Trips!
Rob S.
With the weather warming up again, it’s fair to say that people are going to want to hike more often. Good checklist here for those that are planning for their day trips, whether it’s to protect themselves against the elements, build shelter if need be, or what have you.