Your Guide to Climbing Mt. Hood to the 11,250′ Summit
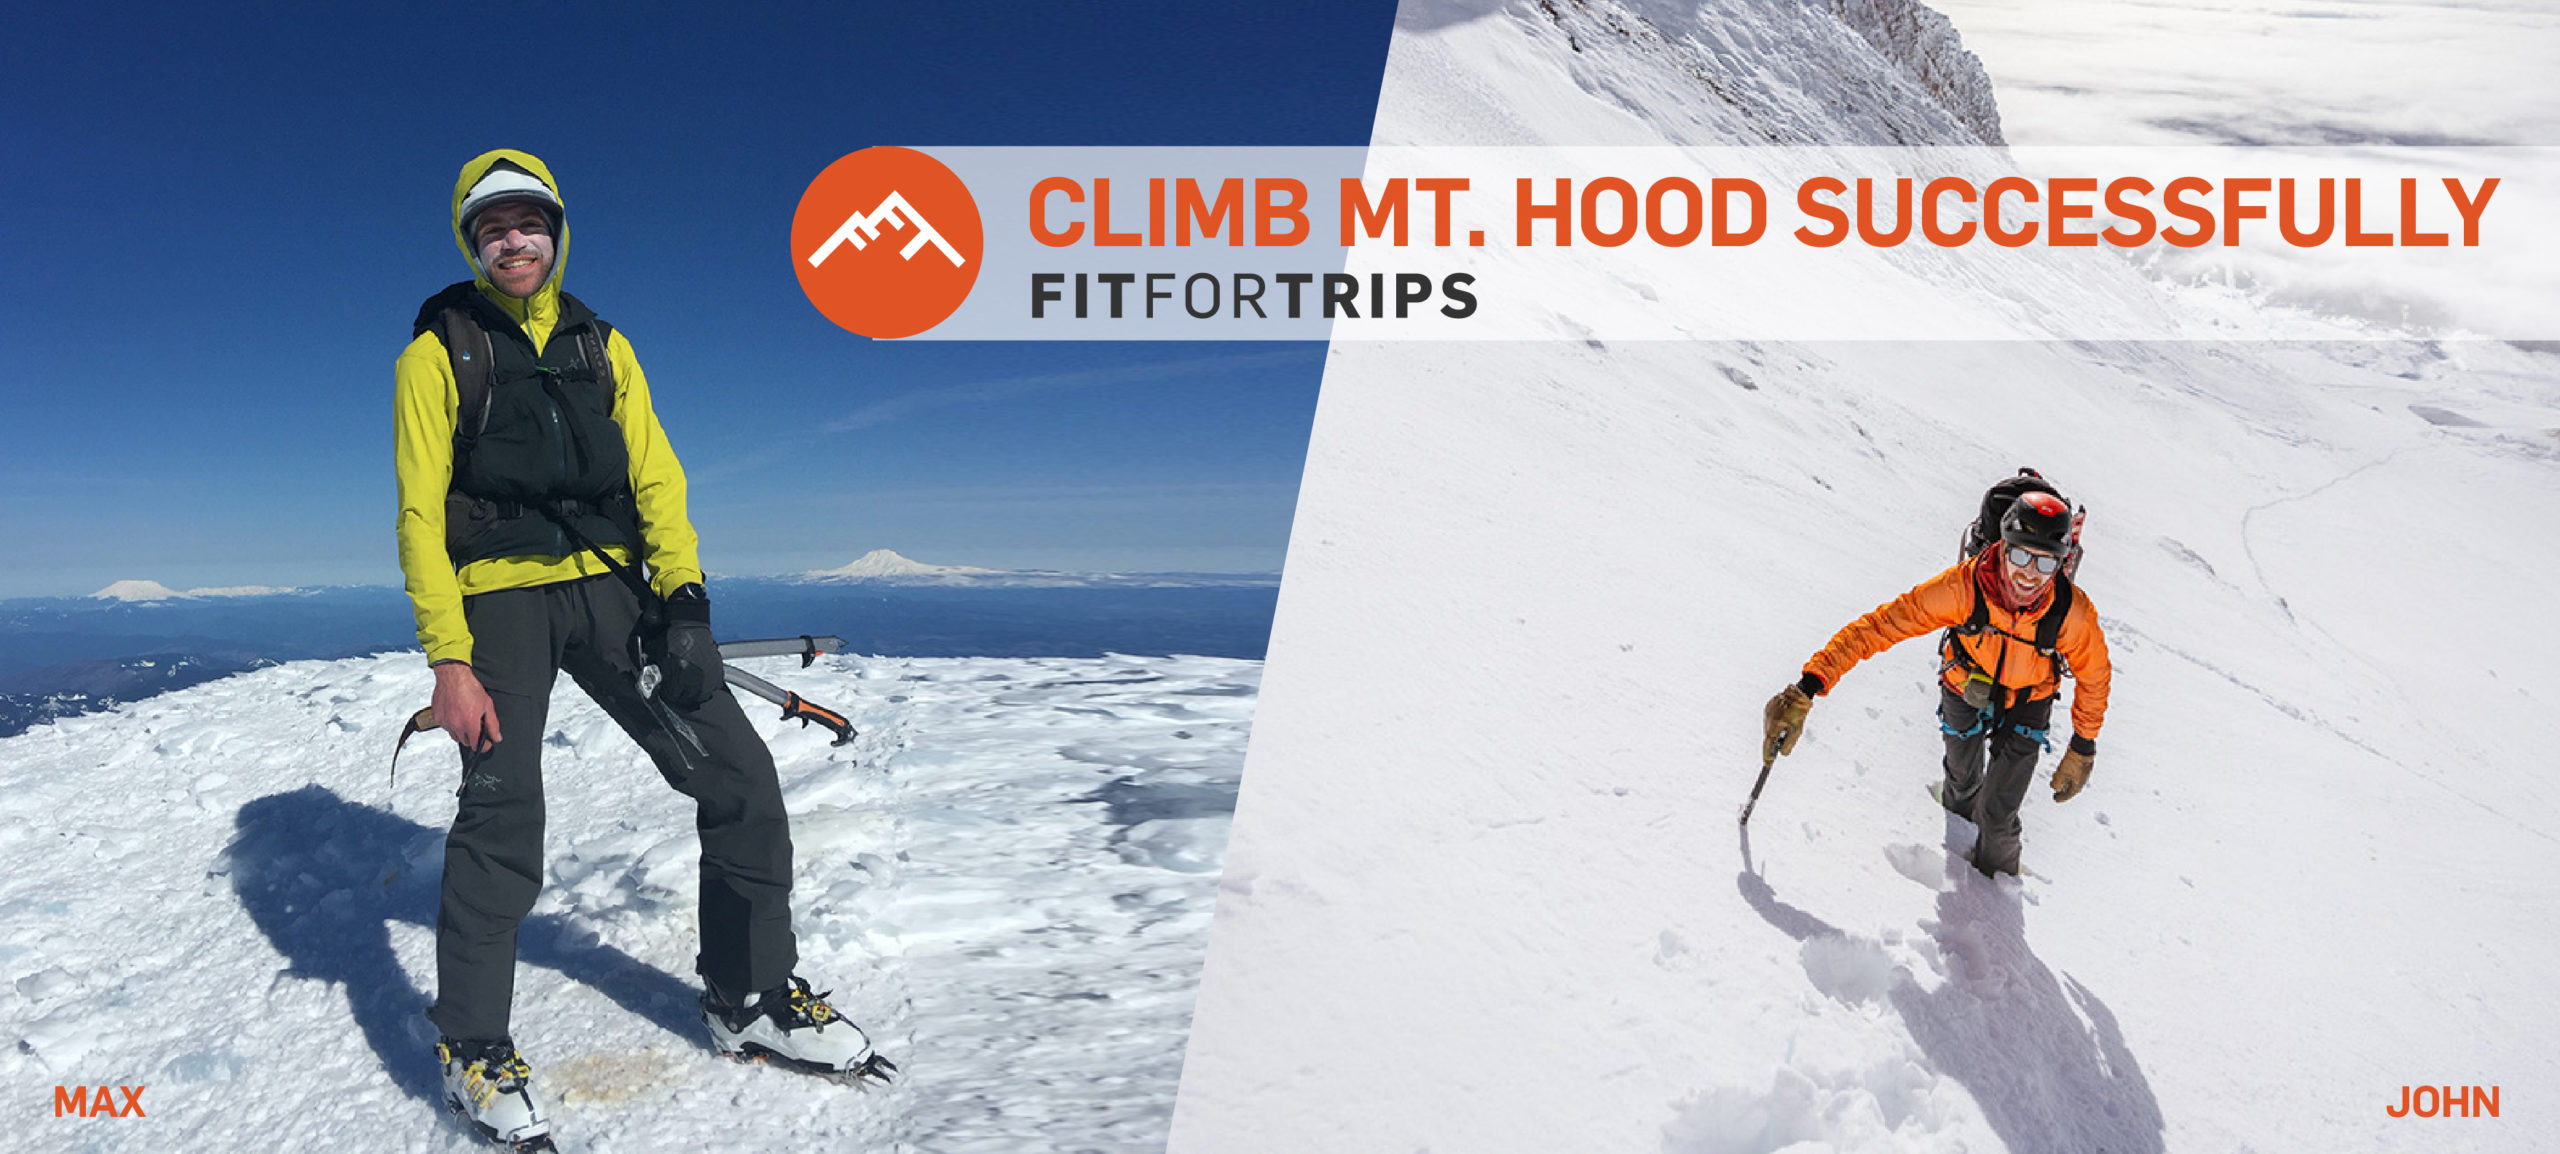
Max Krieger and John Barkhausen are two experienced climbers and are the perfect outdoor experts to provide information about successfully climbing Mt Hood. Max is Fit For Trips’ very own outdoor consultant and has climbed Mt. Hood 15 times. John, who is an instructor and guide for Kaf Adventures, first successfully summited Mt. Hood in the spring of 2018. Since then, he has made 20 total climbs and is the first person I’d turn to as a guide for a technical climb of Mt. Hood.
I interviewed Max and John to get their tips for the perfect guide to climbing Mt. Hood and give you the confidence you need to make the climb. By the end of your read you can determine whether you will go solo or hire John for a successful summit.
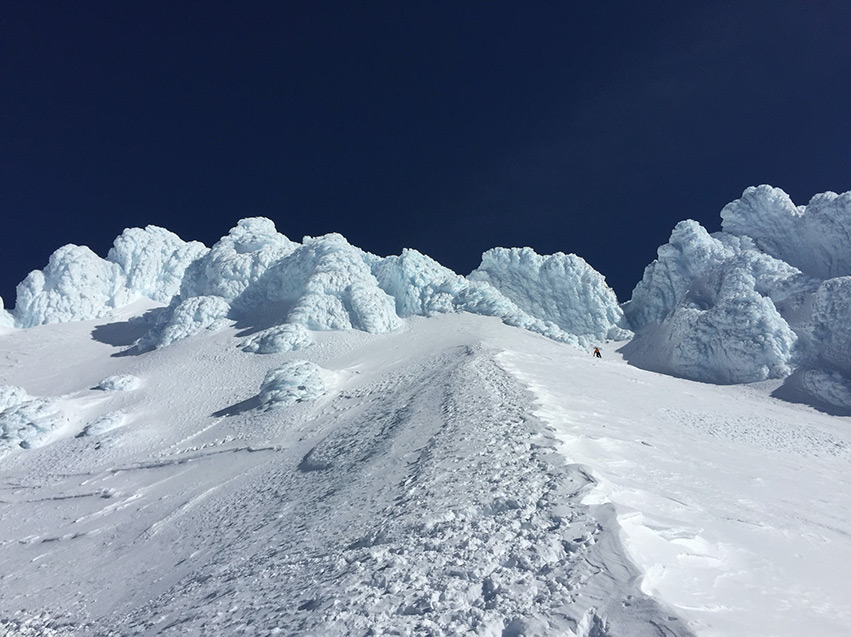
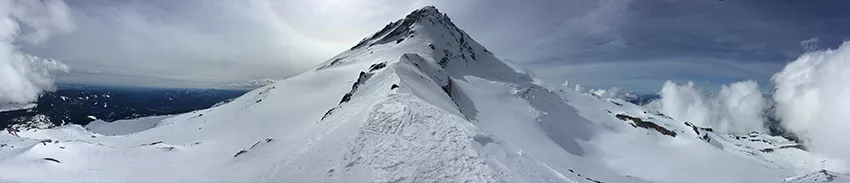 Northside of Mt. Hood. More remote view of summit.
How hard is it to climb Mt. Hood?
Max: This is a product of one’s experience, current fitness level, the conditions, and the route choice. Climbing Mt Hood via the standard South Side Route (easiest route) is mostly just a long walk with a lot of elevation gain, with the exception of the final 1,000 feet or so. This last portion has some steep sections above fumaroles (volcanic steam vents), where the consequence of a fall can be fatal. The surface on those sections can vary from soft snow to hard alpine ice, depending on the conditions. Thus, climbing Mt. Hood should require a certain level of comfort and experience climbing on steep snow with exposure at a minimum.
John: I think the challenge of climbing Mt. Hood really depends on your experience with movement on snow, wearing crampons, using an ice axe, and spending long, hard days in the mountains. With about 5500’ of elevation gain, just pushing hard enough and digging deep to make it to the top can be the biggest challenge.
When should I climb Mt. Hood?
Max: If you are committing to a climb well in advance, you will probably want a reliable weather window of clear skies and high pressure. Early summer is the best bet. June is a great time to climb the mountain because there is still ample snow from the winter still lingering on the higher slopes but the heavy storms that the Pacific Northwest is known for in spring have mostly ended.
On the other hand, winter brings some of the best climbing when a weather window comes. It is then that cracks in the glacier are all covered up and the mountain has some of the best snow and ice covering its many fun routes.
John: I think the earlier, the better, but there’s a large trade off. In April and early May, there is still tons of snow on the mountain and travel can be pretty straightforward, especially in the technical upper sections, but the weather that time of year is less predictable. By late June and early July, the weather is much more predictable (and the days are much longer), but there is much less snow on the mountain.
With less snow on the upper mountain, it can actually become more dangerous to climb late-season. In most seasons, by mid-July or so there is so little snow on the upper mountain that it really isn’t safe to climb anymore.
 The Hogsback on a typical busy day with good conditions. You can pass people, though it’s not safe on the technical section. Starting at midnight is less busy and safer. Sun and wind loosen ice and rocks from the top of the mountain.
How do you train for a Mt. Hood summit?
Max: Marcus, this may be more for you, but, I’d say running is a great way to get in shape for climbing mountains, as well as hiking with a pack on.
John: Walk uphill for long periods of time wearing a heavy backpack. Sustained, mild cardio is the best way to get your body ready for a long summit day. It’s even better if you can add in some days of waking up really early, and then putting your body through 5 or more hours of uphill walking. I find that folks who have some experience with “alpine starts” tend to adapt better to summit, when we wake up as early as midnight to start climbing.
Marcus: I’ll also suggest that walking up and down stairs has a significant carryover for both summit day and descent, so you should incorporate stair walking into your training routine once per week. Once you are ready to peak for your departure date – maybe 2 weeks out – try walking stairs for a total 2500 feet of elevation gain on Saturday and repeating on Sunday; this will be a challenging task. Use the stair elevation gain calculator below to calculate elevation gain on the set of stairs you use to train. For your 2500 foot total climb I recommend something taller like stadium steps or office building stairs. Here’s an article on how to use the stairs calculator below, and you should also check out these stair workout ideas you can use to build up to the 2500 feet of elevation gain workouts.
Elevation Gain Calculator for Mt. Hood Stair Workouts
Is climbing Mt. Hood dangerous?
Max: It can be. As mentioned above, there are some steep sections (around 40 degrees) of snow and sometimes alpine ice where falling can lead to serious injury and death.
John: Climbing Mt Hood is certainly dangerous, but many of those dangers are easily managed. By far the biggest danger, and cause of accidents, is weather. Many people don’t do the proper homework before heading out, or don’t recognize obvious signs of incoming weather, and then get stuck high on the mountain in really bad conditions.
Another big danger is related to weather, but has much more to do with what the snow on the upper mountain is doing. Early in the morning, or on days after large storms up high, climbing conditions can be really firm and icy and therefore really dangerous. Many climbers have suffered long, sliding falls in conditions like this. On the flip side, on any clear and moderately warm day, snow on the upper mountain will warm up and begin falling off of the steeper cliffs and snow fields. This falling snow can be a huge hazard and has caused many accidents.
 Break spot on the bottom of Hogsback, looking up at the final sections of climb. Notice the people on the top left of Hogsback: this a variation of the South Side Route called the Old Chute and is sometimes taken instead of Pearly Gates.
Do you need to rope up to climb Mt. Hood?
Max: Roping up for the South Side Route is an option with guiding services or with a very experienced leader. Sometimes parties will use ropes towards the top on a section called the “Pearly Gates,” where small ice steps can be encountered. Most of the time, however, parties will “solo” the route (meaning each individual climbs unprotected).
John: Many people don’t use a rope while climbing Mt Hood, at least not on the most commonly climbed routes on the South Side of the mountain. Because it’s become common practice to not use a rope, many people don’t think it’s necessary. Using or not using a rope should be an entirely personal decision based on your groups’ risk tolerance and the conditions for that specific day. Every route on Mt Hood has steep enough terrain that a rope is warranted and could be used to help manage the risk of a fall.
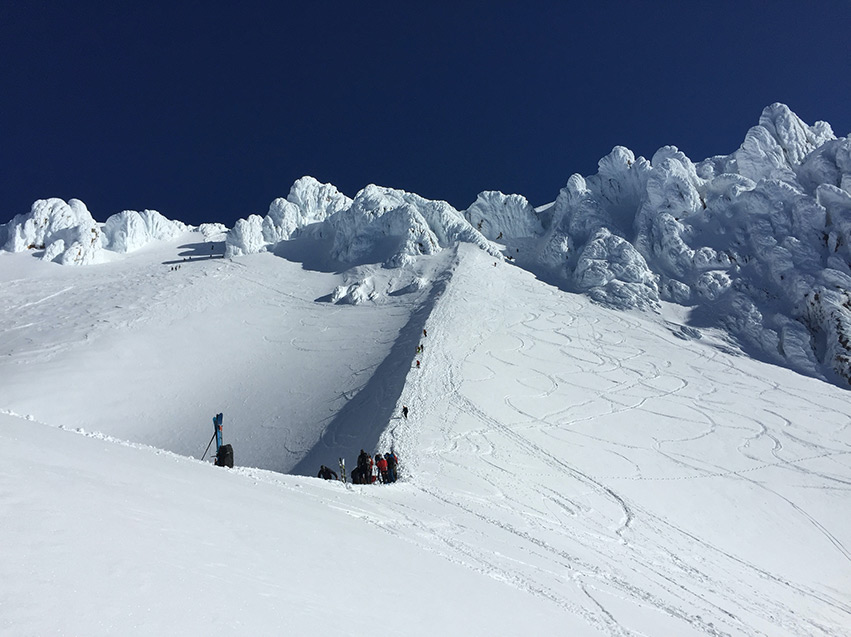
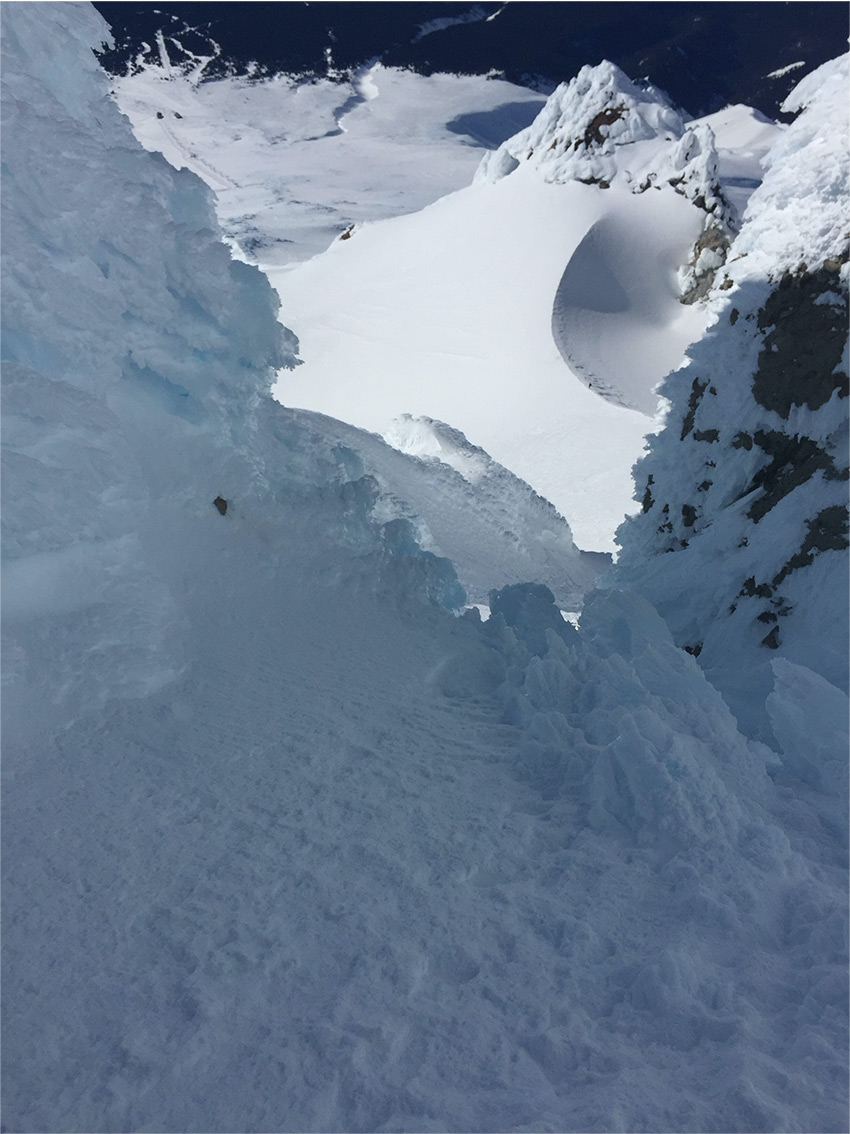
 Looking up from the Hogsback at the Pearly Gates (up and right of the climber in the background). The summit is beyond the ice towers. Looking at different gullies, this is the technical part of the climb. Hogsback gets steeper and more exposed, but not difficult. Pearly Gates can get technical and features some ice climbing. You can find sections that require a couple of steps or moves of technical terrain that are accessible for the beginner. You can’t see the summit from here.
What are some challenging mountains to summit on the continental US and where does Mt. Hood rank?
Max: Mt. Rainier is probably the most challenging, mainly because of the glacier travel, steepness, and length. After that, I’d say probably the Grand Teton and Gannet Peak, both in Wyoming.
John: It sort of depends on what type of mountains you’re hoping to climb, and whether or not you’re hoping to take the easiest route to the top. Mountains like Mt. Whitney are technically easy, but deal with high elevations and can be really challenging physically. Mt. Hood has steep terrain and technical challenges, but is relatively low elevation and has fairly simple access. Mt. Rainier is technically challenging due to glacier travel, and also poses elevation and access challenges.
If you exclude any mountains that require technical rock climbing to reach the summit, I would say Mt Hood is likely in the top 10 or 20 hardest mountains in the continental US to climb.
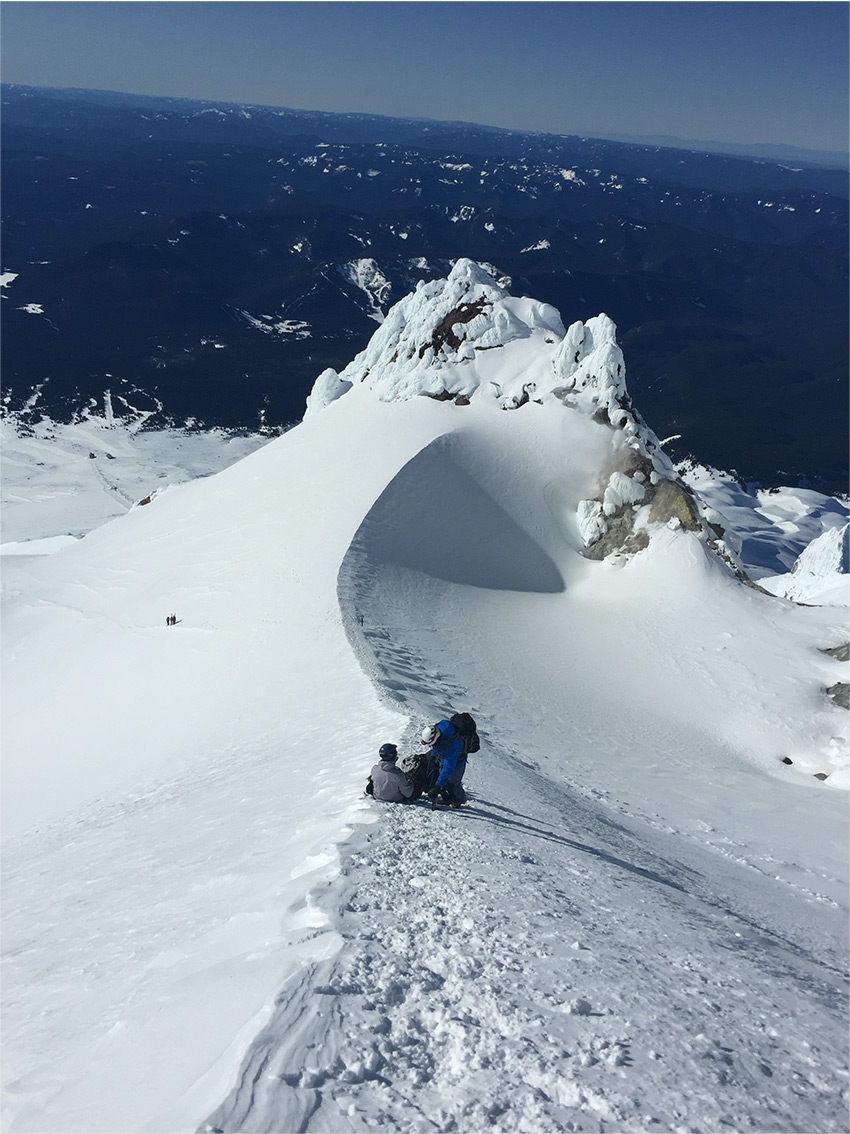
 Looking down at the Hogsback and Crater Rock from the top of the Pearly Gates (right variation). There are right and left Pearly Gates options that you can take. Depending on the time of year, one route will be more challenging than the other.
What equipment do you need for a Mt Hood summit?
Max: At a very basic level, everyone should have an ice axe, crampons, a helmet, and warm layers. Some parties will choose to use a rope, harness, and pieces of protection, such as snow pickets, ice screws, and ice tools.
John: Bare minimum would be a helmet, ice axe, and crampons. A harness, rope, and anchoring materials would be needed if you want to protect climbers through the technical sections. Beyond that, anything that keeps you comfortable and protected on the mountain: food, water, backpacks, warm clothing, climbing boots, etc. And, none of this equipment does any good if you don’t have the training on how to use it.
Footwear
- La Sportiva Nepal Evo ($525) – Price check ⇒ REI / Backcountry | Climbing Magazine Editors’ Choice | Gore-Tex® Insulated Comfort is warm, waterproof, and breathable | Vibram® Matterhorn rubber sole with Impact Brake System | Innovative 3D Flex™ ankle | Removable and adjustable variable fit tongue | Compatible with automatic crampons
- SCARPA Inverno Mountaineering Boot ($379) – Price check ⇒ Backcountry / Moosejaw | Workhorse plastic double boot for freezing cold, waterproof | Pebax® shell is durable and flexible | Removable High Altitude Liner allows insulation | Vibram® sole with automatic and semi-automatic crampon compatibility
- Scarpa Charmoz HD Mountaineering Boots – Men’s ($325) – Price check ⇒ REI / Backcountry | HDry® membranes deliver waterproof/breathable protection | Multi-density polyurethane and EVA midsoles optimize weight and performance | Boots can be resoled | Lightweight | Synthetic leather shell protects from rock and ice | Vibram® Pentax Precision XT rubber outsoles are compatible with semiautomatic crampons
- Scarpa Charmoz HD Mountaineering Boots – Women’s ($325) – Price check ⇒ REI / Backcountry | a Merino wool midweight sock with lifetime warranty thanks to its dense weave. If you wear a hole in it, Darn Tough will replace it for free. No wonder this sock is the most popular long distance hiker sock! Made in Vermont.
Crampons
- Black Diamond Sabretooth Pro Crampons ($185) – Price check ⇒ Black Diamond / REI / Backcountry | Black Diamond’s best all-around crampon for the spectrum of frozen objectives | Clip version features flexible toe strap for boots without a toe welt | For use on a ski boot, order wide toe bails sold separately | Redesigned stainless-steel construction incorporates strong light design with durable horizontal frontpoints | Increased rocker in the front rail to accommodate modern mountain boots | Dual secondary points are optimized for technical precision, while still maintaining a balanced, stable platform on descents and lower angle terrain | Low-profile micro-adjust heel bail offers precision fit | Pro version accommodates boots with a toe welt | Includes front and rear dual-density ABS plates that keep snow from sticking beneath your feet
- Black Diamond Serac Crampons ($185) – Price check ⇒ Black Diamond | Built for the variable, moderate terrain of classic mountaineering routes | Lightweight, 12-point crampon available in three different configurations to be compatible with any kind of mountain boot | Redesigned stainless steel construction incorporates a strong, light design with rocker in the front rail to accommodate modern mountain boots | Horizontal frontpoints provide secure bite in icy steps, while the classic secondary points and substantial rear points offer stability on descents and low-angle terrain | Redesigned stainless steel construction is durable, resists snowballing and won’t rust | Versatile horizontal frontpoints with classic secondary points and stable rear points | Low-profile micro-adjust heel bail offers precision fit | Pro version is for technical boots; Clip version is for mountain boots without a toe welt; Strap version is for non-technical footwear | For use on a ski boot order wide toe bails sold separately | Includes front and rear dual-density ABS plates that keep snow from sticking beneath your feet
- Petzl Vasak Mountaineering Crampon ($159) – Price check ⇒ Backcountry | 12-Point Mountaineering Crampon compatible with any ski, alpine, or hiking boot for booting couloirs and traveling glaciers | Includes step-in Fil or strap-on Fil Flex attachments for ski, telemark, or hiking boots, and the Flexlock Vasak offers hybrid compatibility for any alpine boot with a heel welt and without a toe welt | Antisnow anti-balling plates | Dual horizontal front points for enhanced purchase in solid snow
Ice Axe
- Black Diamond’s Raven Ice Axe with Grip ($109) – Price check ⇒ Black Diamond / REI / Backcountry | Combines new dual-density molded rubber grip and updated Slider Leash for greater security | Lighter, updated investment-cast, stainless steel head with large hole for carabiner | Ergonomically improved for increased comfort while walking | Updated geometry allow for more secure placements and efficient chopping | Revamped spike adds better bite on icy placements with improved plunge-ability | Durable aircraft-grade aluminum shaft improved for more comfortable, better grip | Pick’s curve and teeth engineered to allow secure self-arresting | CEN-B rated
Climbing Helmet
- Black Diamond Half Dome Helmet – Women’s ($65) – Price check ⇒ REI / Moosejaw / Backcountry | Women’s specific fit includes ponytail-friendly shell shape | One-handed size-adjustment dial | Easily adjustable chin strap | Secure headlamp clips | Co-molded EPS foam construction | Low-profile ABS shell offers impact protection
- Black Diamond Half Dome Helmet ($65) – Price check ⇒ Moosejaw / REI / Backcountry | Low-profile polycarbonate shell sits closer while maintaining safety | Updated for more ventilation and a lower weight | lightweight headlamp clips | One-handed fit adjustment dial | Easily adjustable chin strap | Co-molded EPS foam
 Two climbers on the Hogsback, the point on the South Side Route where the climbing gets steeper, looking down at Crater Rock. It’s about an hour to 1.5 hours to the summit from here.
How high can you drive up Mt Hood?
Timberline parking lot, which is about 6000’. On the north side, you can only get to about 4500’.
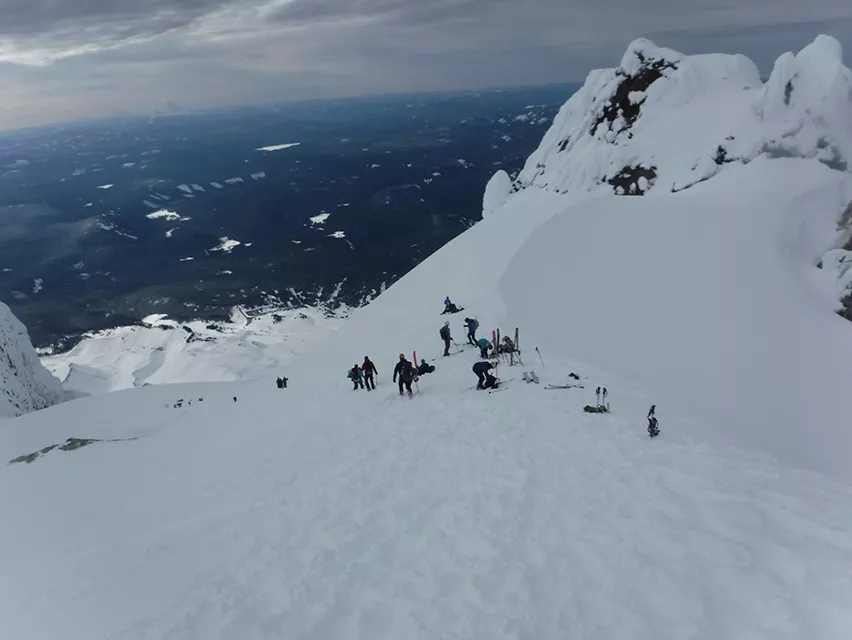 This is base of the Hogsback near Crater Rock. From here people ascend and descend. This section acts as a staging ground for transitions (people take breaks, put on/take off their skis and crampons, eat food, take pictures, etc.).
Where is the best view of Mt Hood?
Max: This is a matter of personal opinion. I personally think the north side of the mountain has some of the best views.
John: Every side of the mountain is beautiful, but the north side is incredibly impressive. There is an easily accessible ridgeline to the east of Mt Hood, just across highway 35. If you gain the ridge, you have incredible views of the entire east side of the mountain.
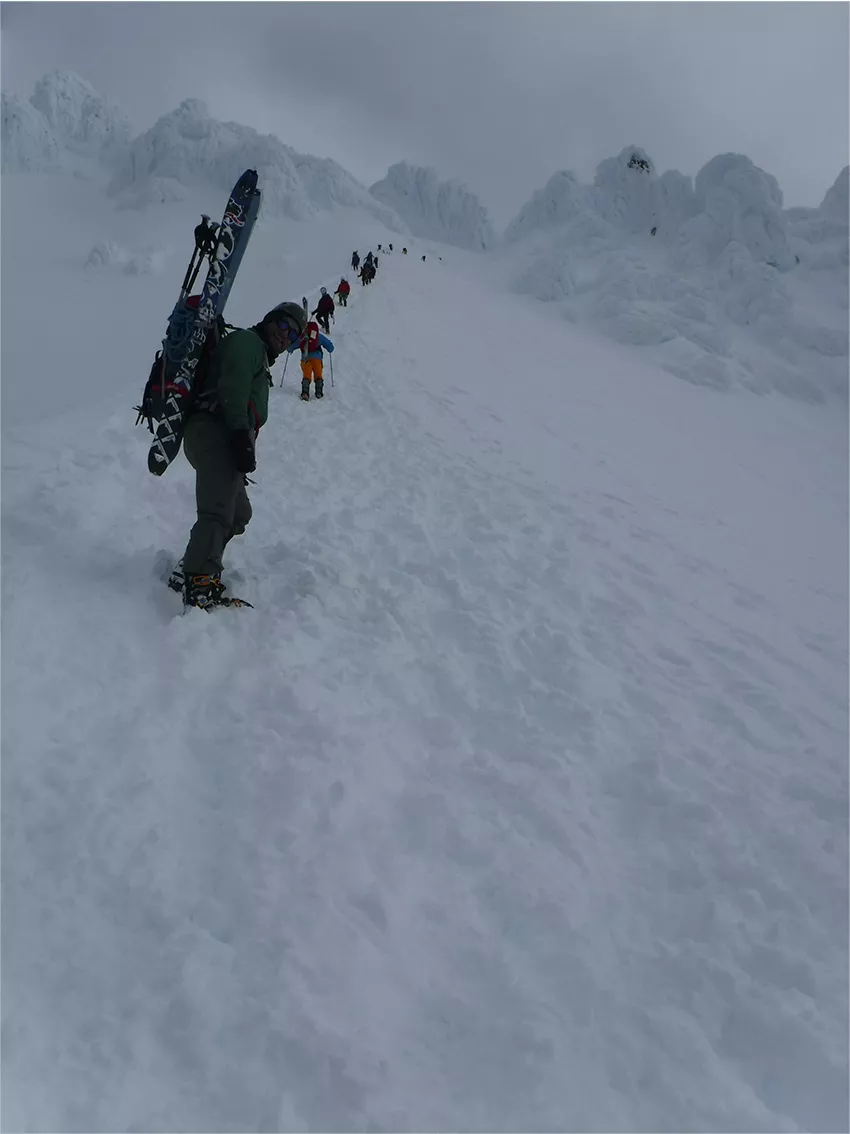
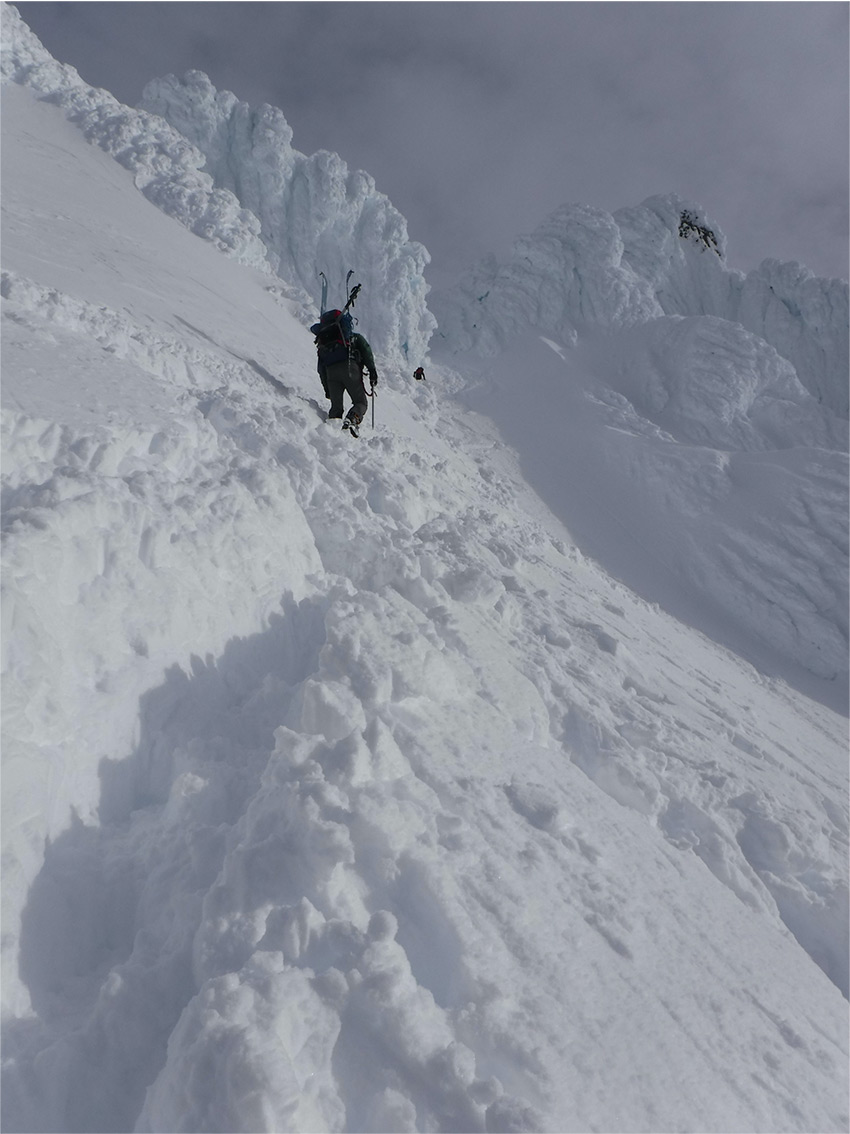
 Traversing from the Hogsback to Devil’s Kitchen Headwall. These folks are going to climb Devil’s Kitchen Headwall, which is accessed from the beginning of the South Side Route. This picture was taken from South Side Route. You will most likely pass by and see other people climbing on your way to the summit. This is the main south side route.
Can you see Mt Hood from Portland?
Max: Yes, it is visible on clear days from many parts of the city.
John: Yep. I can actually see it from my living room in North Portland.
How far is Mt Hood from Portland, OR?
About 60 miles.
 Top of Hogsback, bottom of Pearly Gates. Summit time from here can take an expert 20 minutes unless there is a line of people. A beginner-to-average climber will take approximately 30-60 minutes.
How do you get to Mt Hood without a car?
Max: It is possible to ride a bike to Mt Hood. In fact, a friend of mine has done this many times, one of which was the morning of a skimo race in which he competed. He rode up, ski raced, and rode his bike back down all in the same day.
John: Hearty folks can bike there. There are some shuttles that run from some areas of Portland.
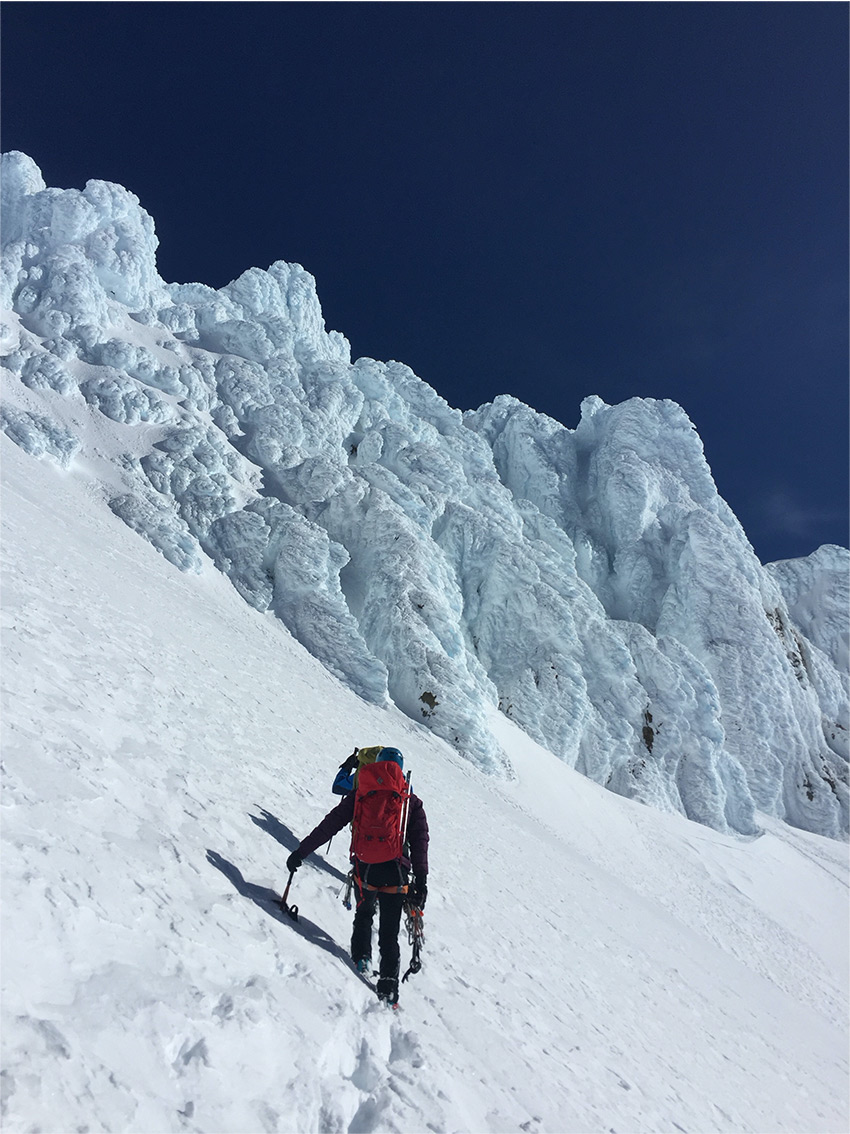
 Although atypical, rime formations can appear on the upper slopes of the mountain. The south side is the the most common route and 90% more people summit there as opposed to other sides/routes. You can ski down the south side or other aspects based on your experience.
Does Mt Hood always have snow?
Max: Kind of… There are glaciers and permanent snow fields on the mountain. However, in low snow years, all the snow from that year’s winter can melt off, leaving just the glacier snow from previous years.
John: Pretty much. Much of the snow melts off every year, but I’d say any day of the year you could find snow somewhere.
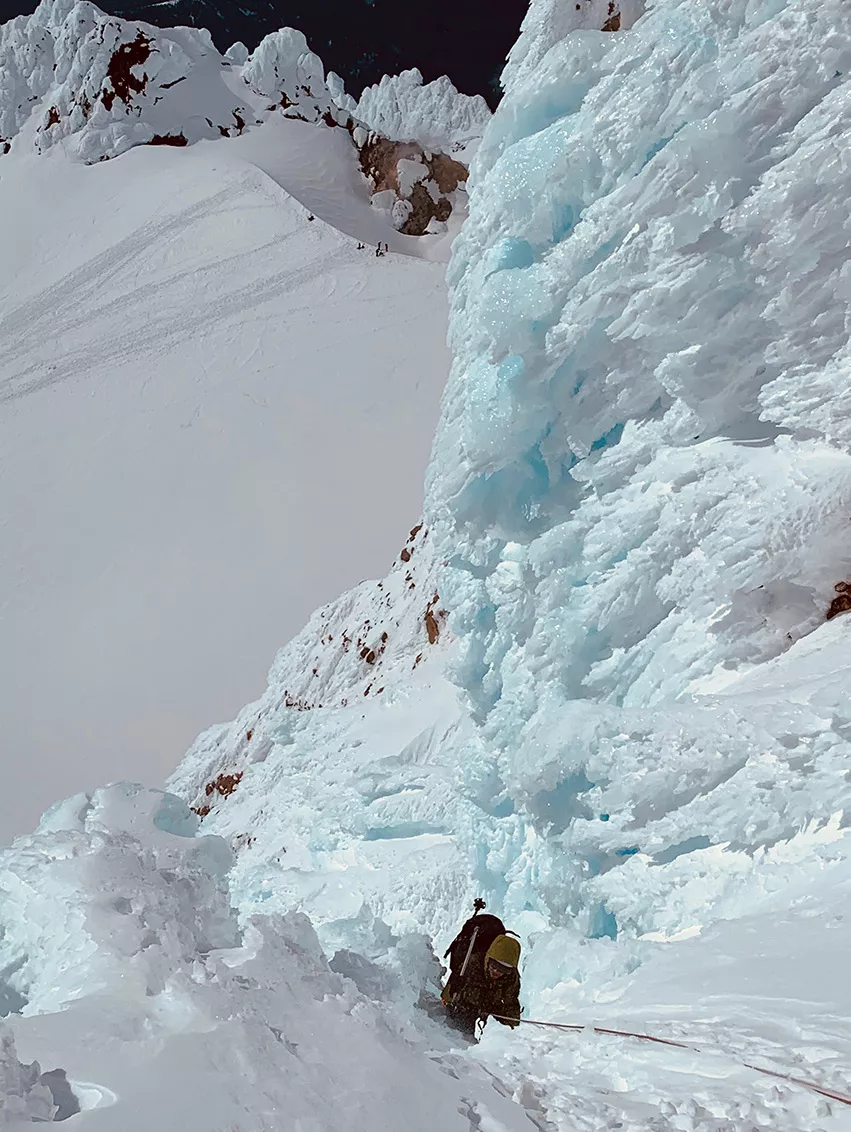
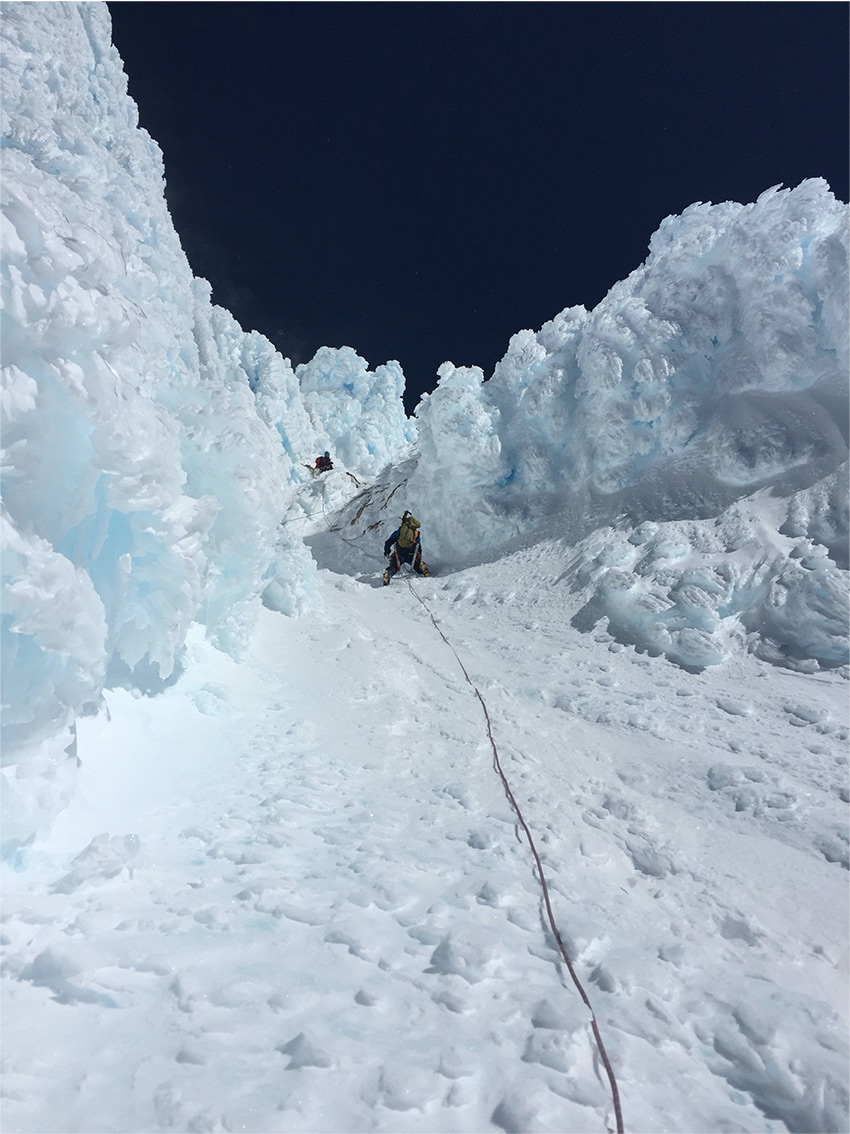 Max climbing Devil’s Kitchen Headwall, Variation 2. Using ropes in general can take longer but are safer. This section can take approximately 1 hour to climb based on experience.
How long does Mt Hood stay open?
Max: There is a ski resort that stays open all year long and which operates on the lower end of one of the glaciers.
John: Technically, it never closes. Access to the mountain isn’t restricted. But, climbing conditions deteriorate by mid-July or so climbing is not advised by around then.
How many feet of elevation gain is it from trailhead to summit?
It is about 5,250 feet.
 Going up the final section of Devil’s Kitchen Headwall and about to top out on the Wy’east route.
What is the altitude at the summit of Mt Hood?
It’s 11,250 feet.
 Max on the Wy’east Route, heading down the mountain. This ridge is East Crater Rim. Mt Jefferson in the background. This is not typical descent area and is retreating due to bad conditions.
What are the most important pieces of equipment you need for climbing Mt Hood?
Max: Honestly, good footwear is probably the most crucial piece of gear you’ll need, just because you’ll be doing so much walking. After that, I’d say sunglasses and sunscreen because you’ll be exposed to so much UV from all the sun and snow. Lastly, I’d say a helmet is pretty important due to all the ice and rock that can fall down from other climbers. After all, Mt Hood is one of the most climbed mountains in the country, maybe the world.
John: Solid boots that will keep you warm and fit your crampons well are probably number one. Layers that keep you warm are probably next. But, that being said, I’ve seen people make it to the top with very little. I saw one guy last year summit in a Hawaiian shirt and shorts. I also saw one guy who did not wear crampons, and just had a hiking stick he found in the woods on the way to the mountain as an “ice axe.” I would not recommend climbing with such a little amount of gear.
Useful mountaineering resources from Kaf Adventures:
- Beginner Mountaineering Course
- Learn Mountaineering Skills in Mt. Hood
- Mt. Hood Summit Climb
- Mt. Hood Summit Skills Course
- Mt Hood 2 Day Guided Ascent
Ready to start training for your next mountaineering, backpacking or hiking trip? Schedule a consultation with me so we can get you set up for success.